Weight Distribution Hitch Setup: 8 Easy Steps
Table of contents
When towing a trailer, a properly configured weight distribution hitch setup/adjustment can make all the difference in ensuring safety, comfort, and control. Whether you’re a first-time tower or an experienced driver, understanding how to adjust a weight distribution hitch, how to set up a weight distribution hitch, and even how to install a weight distribution hitch can prevent sway, improve handling, and reduce wear on your vehicle. While the process might seem intimidating, this guide breaks it into eight simple steps, ensuring a smooth setup and secure towing experience.
Understanding Weight Distribution Hitches
A weight distribution hitch is a towing tool designed to evenly distribute the weight of your trailer across all axles of the tow vehicle and trailer. Unlike standard ball hitches, these hitches use specialized components to improve towing dynamics.
Key Components of a Weight Distribution Hitch:
- Hitch head: Holds the ball mount and connects to the tow vehicle.
- Spring bars: Transfer weight between the trailer and the vehicle.
- Chain brackets: Attach to the trailer frame to secure the spring bars.
Benefits of Using a Weight Distribution Hitch:
- Improved steering and braking control.
- Reduced trailer sway, even in windy conditions.
- Less strain on the rear axle of the tow vehicle.
- Increased towing capacity for many vehicles.
Now, let’s explore the step-by-step process for a proper weight distribution hitch adjustment and setup.
Step-by-Step Weight Distribution Hitch Setup
Step 1: Level the Trailer
When learning how to adjust/set up weight distribution hitch, is important to start by ensuring the trailer is parked on a flat, level surface, such as a paved driveway or a campsite pad. If you’re on uneven terrain, use leveling blocks or ramps to create a stable, level foundation. A level trailer is essential for accurate measurements and ensures a smooth towing experience by evenly distributing weight across the axles.
Use the trailer’s tongue jack to adjust the height of the trailer until it is parallel to the ground. Measure from the ground to the top of the trailer coupler and check that both the front and rear sections of the trailer are at the same height. You can use a carpenter’s level placed on the trailer frame or the side of the trailer to double-check.
Ensuring the trailer is level before proceeding is critical, as it serves as the baseline for all other adjustments. A misaligned trailer can lead to inaccurate hitch setup, resulting in poor handling, increased sway, and uneven weight distribution. Taking the time to level the trailer properly at the start not only saves time but also ensures a safer, more stable towing experience and simplifies how to install a weight distribution hitch effectively.
Step 2: Measure Vehicle and Trailer Heights
Take measurements to determine how the trailer and tow vehicle sit before and after the hitch setup. Measure the distance from:
- The ground to the top of the trailer coupler.
- The ground to the front and rear bumpers of your tow vehicle.
These measurements are crucial for ensuring proper weight distribution hitch adjustment later.
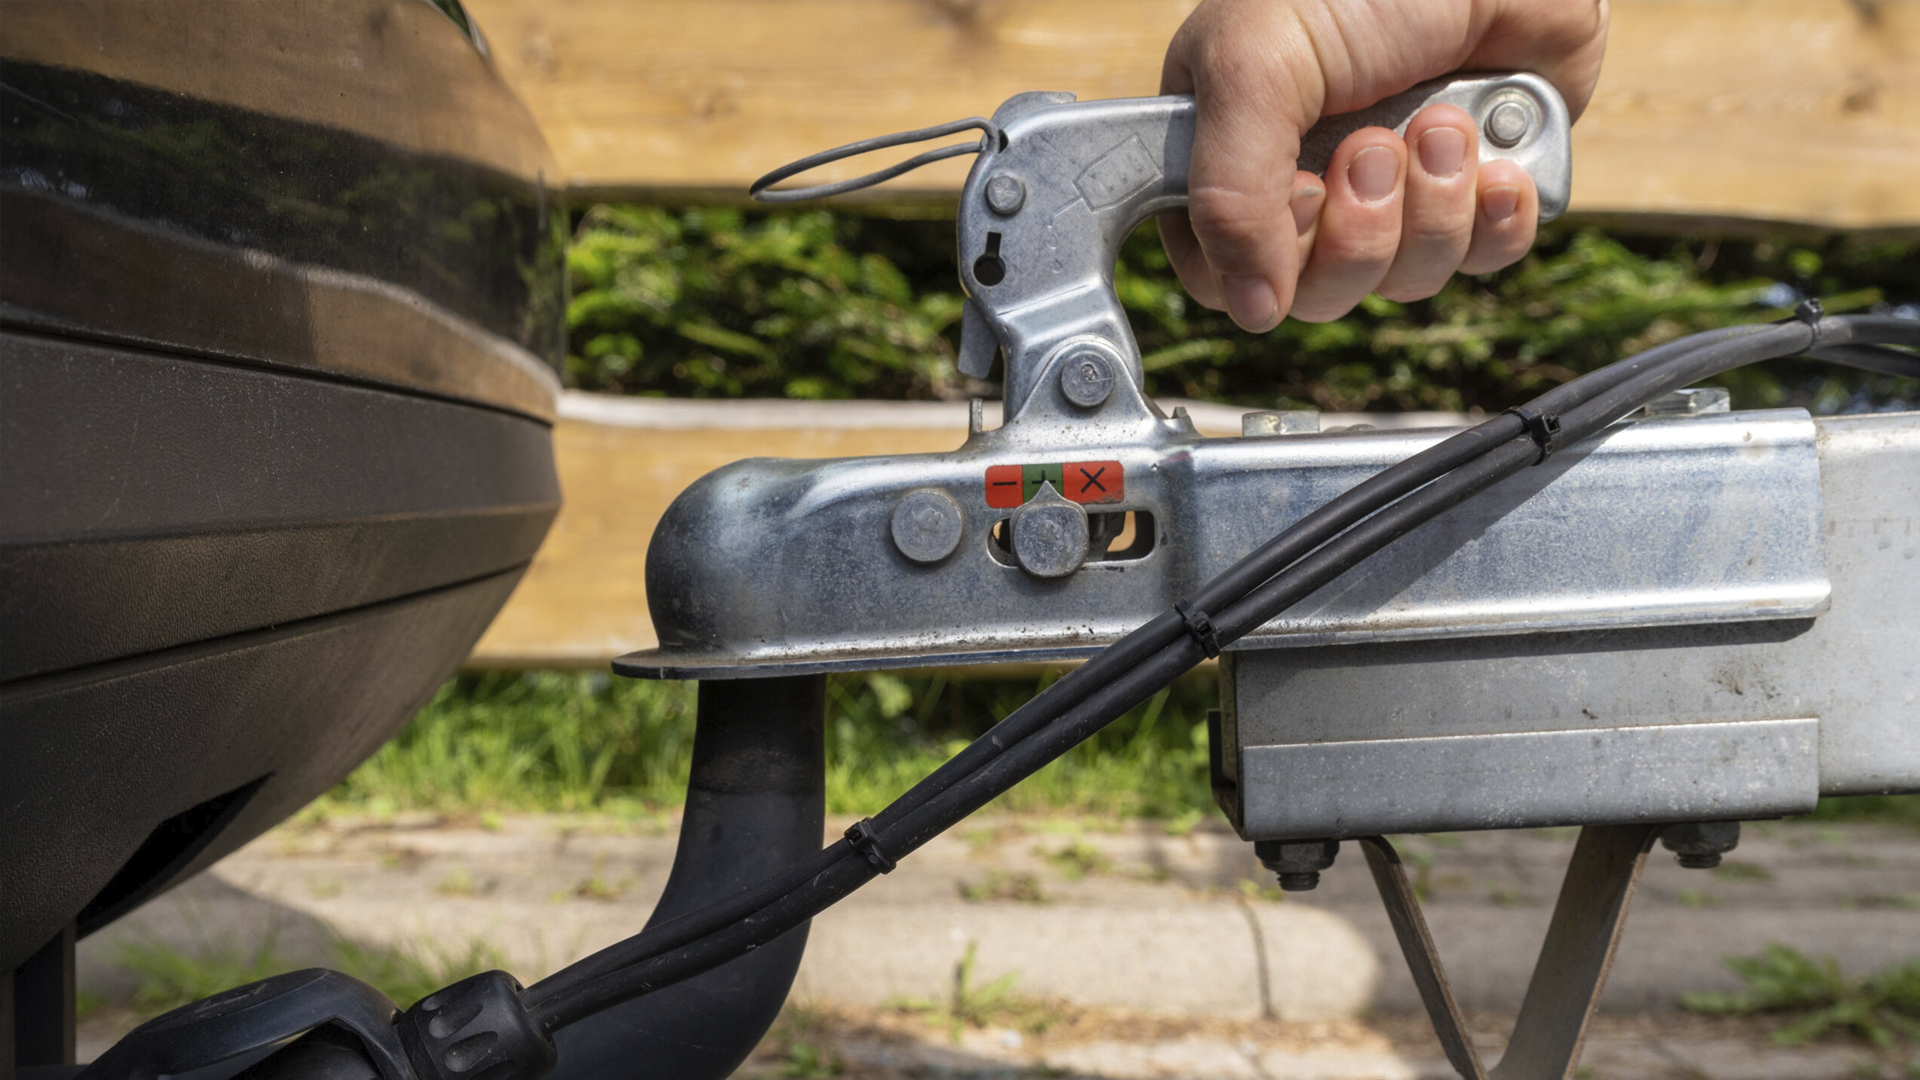
Step 3: Mount the Hitch Head
Attach the weight distribution shank to the receiver tube on your tow vehicle. Position the hitch head on the shank and secure it loosely using one bolt. Adjust the ball height to be 1-3 inches higher than the trailer coupler’s height to allow for weight transfer.
Step 4: Adjust the Hitch Head Angle
Achieving the correct angle for the hitch head is critical. Use the adjustment rod and washers to tilt the head backward or forward as needed. This angle ensures optimal tension on the spring bars for effective weight distribution. Start with 4-6 washers and adjust after testing.
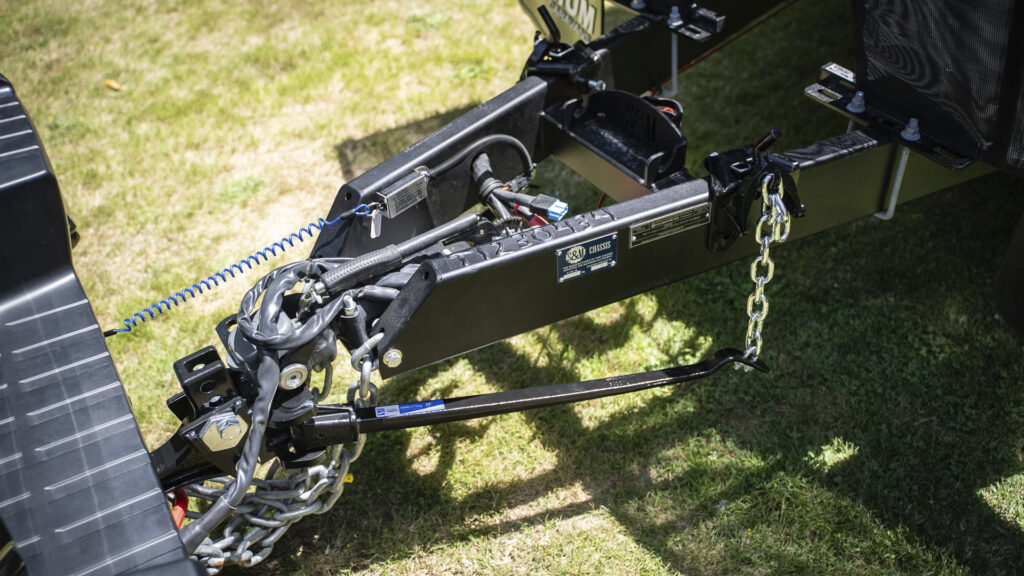
Step 5: Install the Spring Bars
Attach the spring bar chains to the spring bars, and mount them onto the hitch head. Ensure both bars are properly aligned and securely fastened. This step is key to transferring weight effectively.
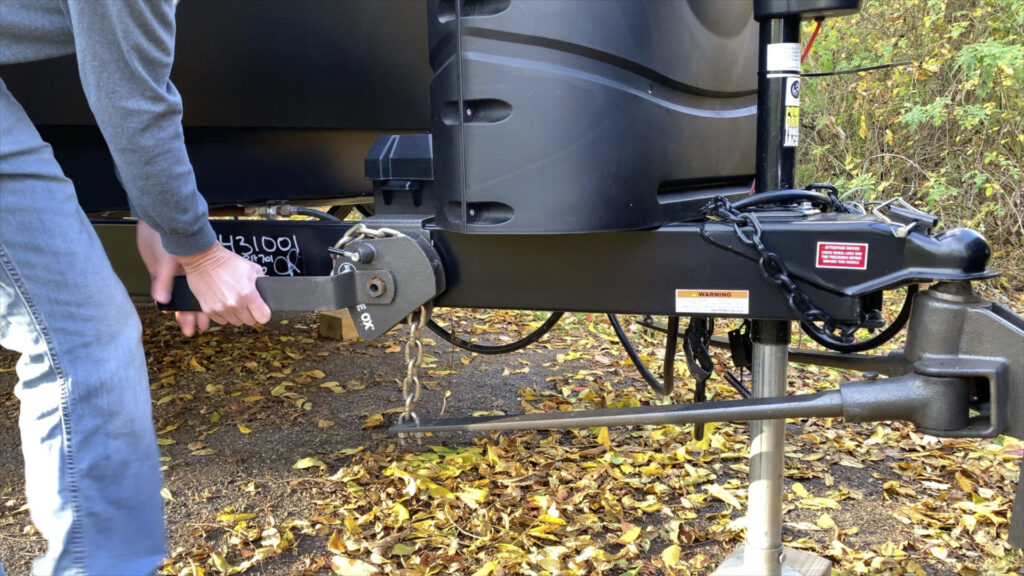
Step 6: Couple the Trailer
Secure the trailer to the tow vehicle’s hitch ball. After latching the coupler, use the trailer jack to slightly lift the rear of the vehicle and trailer. This lift reduces the strain when attaching the spring bars and helps achieve a proper fit.
Step 7: Mount the Spring Bar Hookup Brackets
Attach the spring bar hookup brackets to the trailer frame. Align them evenly on both sides, using the spring bar chains as a guide. Use the lift handle to raise the bars and lock the brackets into place. Ensure they are secure to prevent any issues during travel.
Step 8: Make Final Adjustments
Retract the trailer jack and re-measure the vehicle and trailer heights. Check that the tow vehicle is level, and adjust the hitch head tilt or chain links if necessary. The goal is a balanced load with no significant sag at the rear of the tow vehicle.
Tips for Proper Use and Maintenance
To maintain a safe and efficient weight distribution hitch setup, follow these best practices:
Inspect Regularly: Before each trip, thoroughly examine all components of the hitch setup, including the hitch head, spring bars, chains, and brackets. Look for signs of wear, rust, cracks, or any damage that might compromise the system’s integrity. Addressing small issues early can prevent major failures on the road.
Lubricate Moving Parts: Proper lubrication is essential for reducing friction and wear on critical components like the hitch head, pivot points, and spring bars. Use high-quality grease designed for towing equipment, and clean off old grease periodically to avoid dirt and debris buildup, which can cause additional wear.
Recheck Adjustments: Towing conditions can change during long trips, such as shifts in cargo weight or terrain. Re-measure the vehicle and trailer heights regularly to ensure the setup remains balanced. Adjust the spring bar chain links or the hitch head angle as needed to maintain optimal weight distribution.
Ensure Proper Tension: Confirm that the spring bars are providing enough tension to distribute the weight effectively but not so much that it compromises the ride quality or places undue strain on the vehicle or trailer.
Clean and Protect Components: After each trip, clean the hitch components to remove dirt, salt, or grime. Store the hitch parts in a dry, safe place to prevent corrosion when not in use.
Seek Professional Help: If you’re uncertain about how to set up a weight distribution hitch or notice persistent issues like uneven weight distribution or excessive sway, consult a professional installer. They can provide expert adjustments and ensure your setup meets safety standards.
By following these steps and maintenance tips, you’ll not only master how to install/ set up/ adjust a weight distribution hitch but also enjoy safer, more comfortable towing experiences. Proper weight distribution hitch adjustment ensures a smooth ride, reduces vehicle strain, enhances handling, and extends the life of your towing equipment.
Maximize Stability and Comfort with Custom RV Skirting
Ready to enhance your RV setup? Complement your weight distribution hitch with custom RV skirting for unmatched stability and protection.
RV skirting is more than just insulation—it’s an essential upgrade for any RV enthusiast using a weight distribution hitch, especially for long-term stays. Custom skirting reduces wind resistance, minimizes cold air circulation under your RV, and enhances towing stability, ensuring your equipment performs at its best.
With our “No-Snap, No-Gap” channel system, you’ll enjoy a flawless fit that protects against the elements, whether you’re parked in harsh winter conditions or breezy open plains. Take the next step in creating a safer and more comfortable RV experience.
Get custom RV skirting today and tow with confidence!