The Best RVs for Winter Skirting
Table of contents
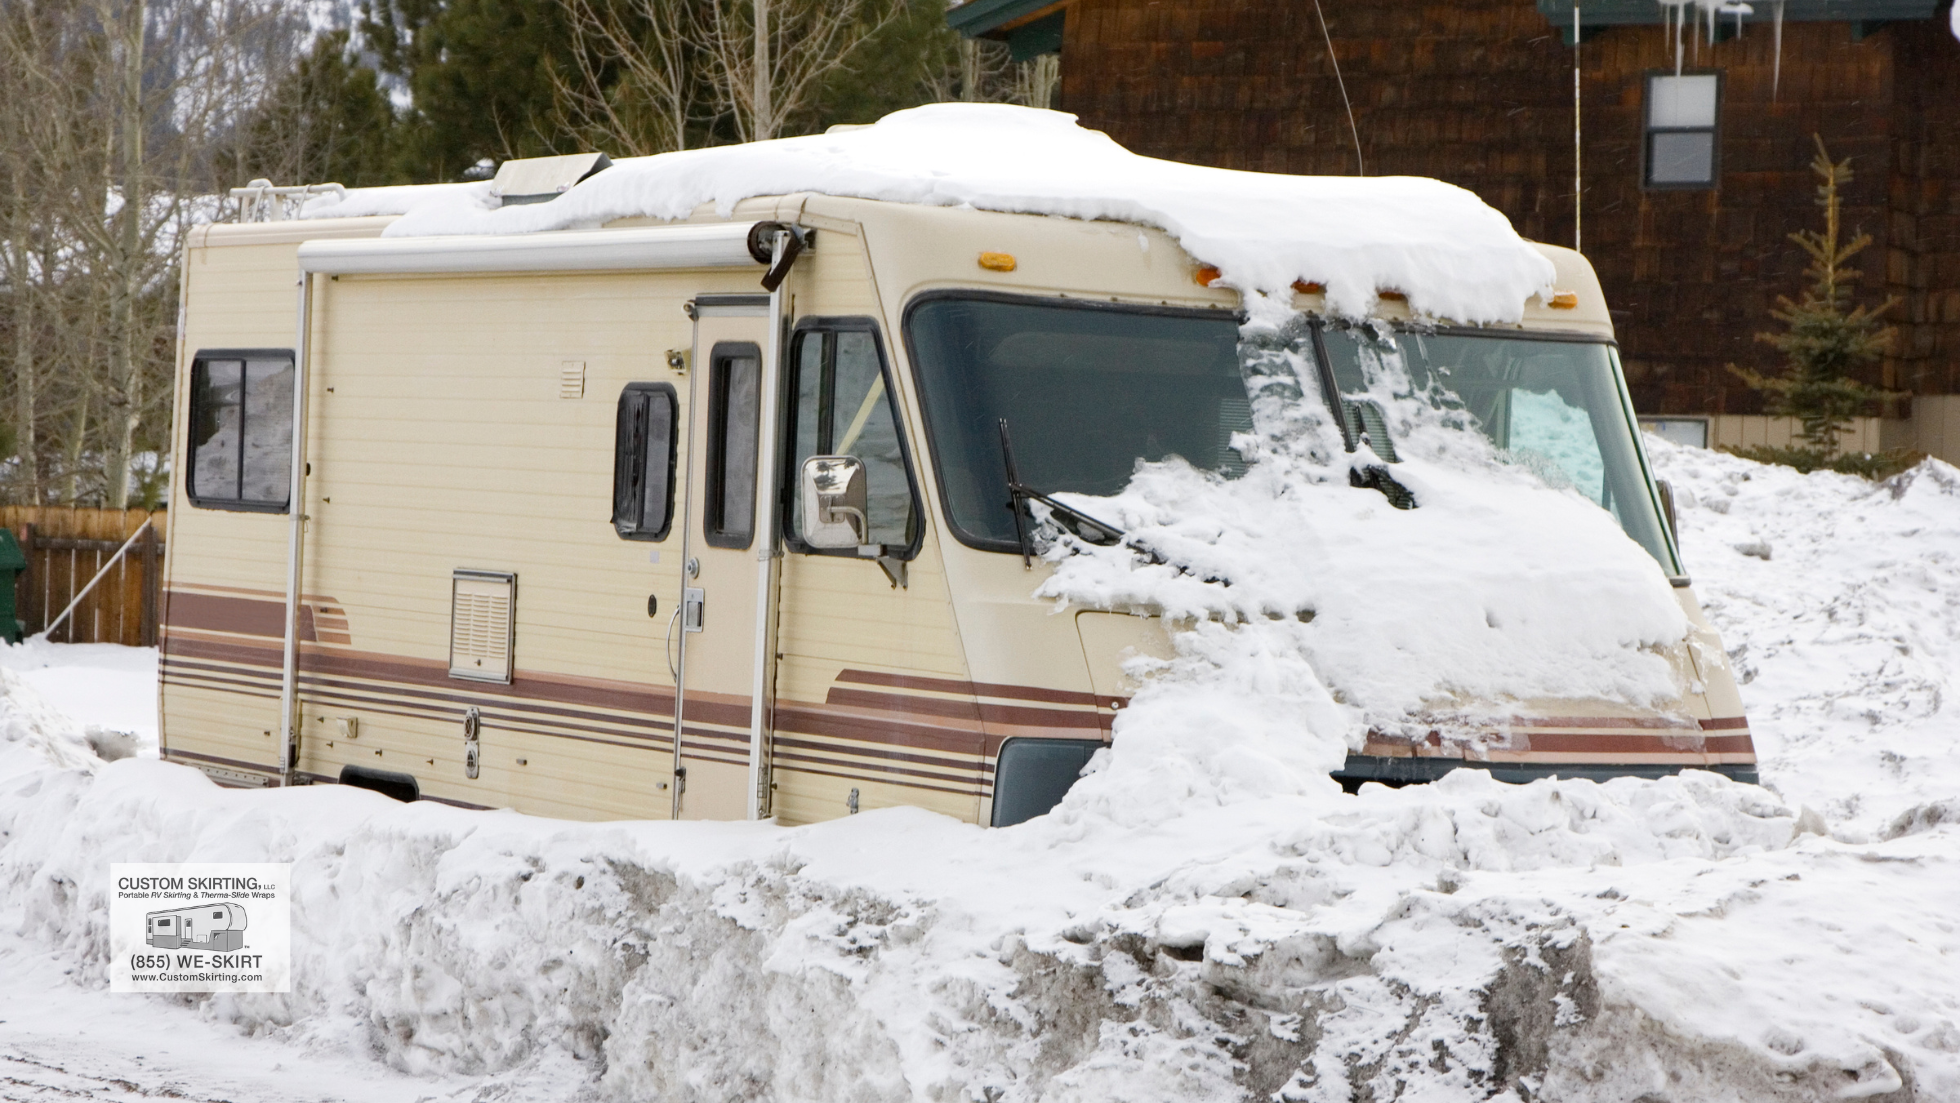
Winter RV camping presents unique challenges that require specialized solutions to maintain comfort and protect your investment. Finding the best RV skirting for winter is essential for anyone planning to camp or live in their RV during cold weather. RV skirting creates a crucial barrier between the underside of your camper and the frigid outside air, preventing frozen pipes, reducing heating costs, and maintaining comfortable interior temperatures. Whether you’re a full-time RVer facing your first winter or a seasonal camper preparing for an extended cold-weather stay, the right RV skirting for winter—also referred to as camper skirting for winter—can make the difference between a cozy experience and a costly disaster. This comprehensive guide explores the five best camper skirting for winter options, helping you choose the perfect RV winter skirting solution for your specific needs, budget, and travel style.
What is Skirting?
RV skirting is a protective barrier installed around the bottom perimeter of a recreational vehicle (RV or Camper). It serves as insulation and protection against harsh weather conditions, especially during winter. Camper skirting for winter is particularly important to prevent freezing pipes and reduce heat loss. Skirting is typically made of materials like vinyl, fabric, or rigid foam board, and it is attached to the lower part of the RV, enclosing the space between the ground and the RV’s base.
Protection from Freezing Temperatures
The underside of your RV houses vital components, including water tanks, pipes, and valves that are vulnerable to freezing. When temperatures drop below 32°F, these systems risk freezing and potentially bursting, leading to expensive repairs. Proper RV skirting for winter creates a buffer zone that maintains higher temperatures underneath your RV, significantly reducing the risk of frozen plumbing.
Improved Energy Efficiency
Without skirting, cold air constantly circulates beneath your RV, creating a cooling effect on your floor and interior. This forces your heating system to work overtime, consuming more propane or electricity. By installing the best RV skirting for winter—or opting for camper skirting for winter in colder climates—you can reduce heat loss by up to 25–35%, resulting in substantial energy savings during extended winter stays.
Enhanced Comfort
Proper skirting eliminates drafts and cold spots inside your RV, creating a more comfortable living environment. The floor remains warmer, making the entire space more pleasant during cold weather.
Different RVs, Different Needs
The type of RV you own affects your skirting requirements:
- Motorhomes: Often have better factory insulation, but still benefit from skirting around exposed areas
- Fifth Wheels: Require special attention around the raised front section
- Travel Trailers: Typically need comprehensive skirting due to their elevated position and less insulated construction
Most RV owners should consider installing skirting when nighttime temperatures consistently fall below 40°F, with it becoming absolutely essential once temperatures approach or drop below freezing.
RV skirting is especially popular among RVers who spend extended periods in colder climates, as it enhances comfort, protects the RV from winter-related damage, and ultimately prolongs the life of the vehicle—saving tons of money and increasing comfort in the process. Camper skirting for winter is a smart investment for those looking to stay warm and reduce energy costs during cold-weather camping.
What Not to Use for RV Skirting
Before exploring the best options, it’s important to understand what materials to avoid when creating rv skirts for winter:
Hay Bales and Straw
Despite being a common suggestion in RV forums, hay bales and straw present serious hazards:
- Extreme fire risk, especially near heaters or RV exhaust
- Attract rodents, insects, and other pests that can damage your RV
- Decompose when wet, creating mold and mildew problems
- Difficult to remove completely in spring
Bricks and Cinderblocks
While seemingly sturdy, these materials have significant drawbacks:
- Create uneven seals that allow cold air infiltration
- Provide hiding spots and entry points for mice and other pests
- Heavy and cumbersome to transport and position
- Can damage your RV’s exterior if they shift or fall
Particle Board and Plywood
These wood products might seem like affordable solutions but come with serious problems:
- Quickly deteriorate when exposed to moisture
- Warp and break down after a single season
- Difficult to store when not in use
- Create disposal challenges when they become unusable
- Provide poor insulation compared to purpose-designed materials
Avoiding these inappropriate materials will save you time, money, and potential damage to your RV in the long run.
Types of RV Skirts
There are several types of RV skirts available, each with its own set of advantages and considerations. Here’s a list and description of the common types of RV skirts:
1. Foam Board Insulation Skirting
Foam board insulation represents one of the most popular DIY options for RV winter skirting due to its accessibility, effectiveness, and relatively low cost.
What It Is: Rigid foam insulation panels (typically 1-2 inches thick) made from polystyrene, polyisocyanurate, or extruded polystyrene (XPS). The boards come in 4’x8′ sheets that can be cut to fit your RV’s specific dimensions.
Installation Process:
- Measure the perimeter and height needed (from the ground to your RV’s bottom edge)
- Cut foam boards to appropriate sizes using a utility knife or saw
- Attach to the RV using tape, adhesive, or specialized clips
- Seal seams between panels with foil tape
- Secure the bottom edge with rocks, sandbags, or by burying slightly in the ground
- Create access points for storage compartments as needed
Cost: Approximately $100-200 for a typical RV, depending on size and insulation thickness
Pros:
- Excellent insulation value (R-value of 3.5-6.5 per inch)
- Readily available at home improvement stores
- Easy to cut and customize
- Lightweight compared to many alternatives
- Can be reused for multiple seasons if properly stored
Cons:
- Susceptible to wind damage if not properly secured
- Can be damaged by UV exposure over time
- Bulky to transport and store
- Less aesthetically pleasing than professional options
- Environmental concerns with disposal
Installation Tips:
- Use a straight edge when cutting for cleaner lines
- Leave small ventilation gaps to prevent moisture buildup
- Consider painting the exterior side to extend UV resistance
- Use bungee cords through grommets for easier installation and removal
Foam board represents the best RV skirting for winter for budget-conscious RVers who don’t mind putting in some DIY effort and have storage space available.
2. Vinyl RV Skirting
Vinyl skirting offers a more polished, professional solution for winter RV protection with several implementation options.
Professional Custom Installation
What It Is: Custom-measured, professionally manufactured vinyl skirting designed specifically for your RV model.
Process:
- Professional technicians measure your specific RV
- Custom panels are manufactured to precise specifications
- Installation includes proper hardware and attachment systems
- Often includes doors for access to storage and utilities
Cost: $1,500-3,000+ depending on RV size and complexity
Pros:
- Perfect fit with professional appearance
- Durable materials designed for multiple seasons
- Proper ventilation built into the design
- Typically includes warranty protection
- Saves significant time and effort
Cons:
- Highest cost option
- May require scheduling installation appointments
- Some systems require professional removal and reinstallation
Custom Skirting offers professional installation services with their innovative “No-Snap, No-Gap” channel system that provides superior protection against the elements.
Self-Installed Custom Kits
What It Is: Pre-manufactured vinyl skirting kits designed for self-installation.
Process:
- Purchase a kit designed for your RV type
- Follow included instructions for measurement and installation
- Attach using the provided hardware system
- Trim as needed for a custom fit
Cost: $800-1,200 for most RVs
Pros:
- More affordable than professional installation
- Higher quality materials than DIY solutions
- Includes proper attachment hardware
- Designed specifically for RV applications
- Reusable for multiple seasons
Cons:
- Requires some technical skill to install properly
- May not fit as perfectly as professional custom options
- Still represents a significant investment
DIY Vinyl Solutions
What It Is: Creating your own skirting using vinyl tarps or heavy-duty vinyl material.
Process:
- Purchase heavy-duty vinyl material or tarps
- Measure and cut to appropriate dimensions
- Install using grommets, adhesive, or specialized clips
- Secure bottom edges with weights or by burying in soil
Cost: $200-500 depending on materials chosen
Pros:
- More affordable than commercial options
- Can be customized to your specific needs
- More durable and weather-resistant than foam board
- Relatively lightweight and easier to store than rigid materials
Cons:
- Requires significant DIY skills
- May lack the polished appearance of commercial options
- Can be challenging to create proper seals
- May require reinforcement in high-wind areas
Vinyl skirting in its various forms represents one of the most versatile and effective options for camper skirting for winter, with solutions available for every budget and skill level.
3. Insulated Tarps
Insulated tarps provide an excellent balance of effectiveness, affordability, and ease of use, particularly for RVers who relocate frequently during winter.
What They Are: Specialized tarps with built-in insulation layers, typically consisting of a reflective layer sandwiched between durable outer materials. Unlike standard tarps, these are specifically designed to provide thermal protection.
Installation Process:
- Measure the perimeter and height requirements
- Cut tarps to appropriate dimensions if needed
- Attach to RV using grommets, bungee cords, or specialized clips
- Create overlapping sections for access points
- Secure bottom edges with weights, stakes, or by burying slightly
Cost: $300-600 depending on quality and RV size
Pros:
- Excellent wind resistance when properly installed
- Lightweight and easy to fold for storage
- More durable than foam board in harsh conditions
- Provides good insulation value for the weight
- Quick to install and remove compared to rigid systems
Cons:
- Less insulating than thicker rigid options
- May require additional reinforcement in extreme conditions
- Can develop tears or damage at attachment points
- Typically less aesthetically pleasing than custom vinyl
For RVers who travel between different winter locations, insulated tarps represent one of the best rv skirting for winter options due to their portability and quick setup/takedown times.
4. Reflectix Insulation
Reflectix offers a lightweight, flexible solution that’s particularly effective in moderate winter conditions.
What It Is: A reflective insulation consisting of multiple layers of aluminum foil with bubble wrap or similar material in between. It works primarily by reflecting radiant heat rather than providing substantial R-value insulation.
Installation Process:
- Measure and cut Reflectix to appropriate dimensions
- Attach to RV using tape, adhesive, or specialized clips
- Seal seams with foil tape for better performance
- Secure bottom edges with weights or by burying slightly
- Consider doubling up layers for improved insulation
Cost: $150-300 for a typical RV
Pros:
- Extremely lightweight and easy to handle
- Folds compactly for storage
- Effective at reflecting heat back toward the RV
- Easy to cut and customize
- Resistant to moisture and mold
Cons:
- Lower insulation value than foam board or vinyl options
- Tears more easily than other materials
- Less effective in extreme cold conditions
- Requires careful sealing to prevent air leakage
- May not be allowed in some RV parks due to appearance
Installation Tips:
- Use a double layer with an air gap for improved performance
- Combine with a windbreak for better results in windy conditions
- Consider adding a more durable outer layer in high-traffic areas
Reflectix works best as RV skirting for winter in moderate climates or as a supplemental layer in a multi-material skirting system.
5. AirSkirts (Inflatable Skirting)
AirSkirts represent the newest innovation in RV skirting technology, offering unprecedented convenience and effectiveness.
What They Are: Inflatable tubes that create an air barrier around the perimeter of your RV. The system uses the insulating properties of trapped air to create an effective thermal barrier.
Installation Process:
- Unpack the inflatable tubes from their storage bags
- Position around the perimeter of your RV
- Inflate using the provided pump (typically takes 30-60 minutes)
- No tools, drilling, or permanent modifications required
Cost: $1,500-2,500 depending on RV size
Pros:
- Extremely easy setup with no technical skills required
- No damage to RV exterior
- Excellent for frequent travelers (sets up and packs down quickly)
- Creates a perfect seal with the ground regardless of terrain
- Provides good insulation through trapped air
- Stores in a fraction of the space of rigid systems
Cons:
- Higher initial investment
- Potential for punctures (though repair kits are included)
- May require occasional reinflation during extended stays
- Less established track record than traditional options
For RVers who prioritize convenience and frequently change locations, AirSkirts represent one of the best rv skirting for winter options despite the higher initial cost.
Cost Comparison of RV Skirting Options
When evaluating the best RV skirting for winter for your situation, cost considerations extend beyond just the initial purchase price:
| Skirting Type | Initial Cost | Lifespan | Installation Time | Storage Space | Skill Level | Long-Term Value |
|---|---|---|---|---|---|---|
| Foam Board | $100-200 | 1-2 seasons | 4-8 hours | Large | Beginner | Good for occasional use |
| Professional Vinyl | $1,500-3,000+ | 5-10+ years | Professional (4-6 hours) | Medium | None (professional) | Excellent for permanent setups |
| DIY Vinyl | $200-500 | 3-5 years | 6-10 hours | Medium | Intermediate | Good all-around value |
| Insulated Tarps | $300-600 | 2-4 years | 2-4 hours | Small | Beginner | Excellent for travelers |
| Reflectix | $150-300 | 1-3 seasons | 3-6 hours | Small | Beginner | Good for moderate climates |
| AirSkirts | $1,500-2,500 | 5+ years | 1 hour | Small | Beginner | Excellent for frequent movers |
Additional Cost Factors to Consider:
- Heating Savings: Quality skirting can reduce heating costs by 25-35%, potentially saving hundreds of dollars per winter for full-timers
- Damage Prevention: Protecting pipes from freezing can avoid repairs costing $1,000+
- Resale Value: Professional skirting may increase your RV’s resale value
- Replacement Parts: Some systems require periodic replacement of components
- Tools Required: Some DIY options require specialized tools for installation
For most RVers, the best value comes from matching the skirting type to your specific usage pattern rather than simply choosing the cheapest option.
Installation Tips and Best Practices
Regardless of which RV winter skirting option you choose, these installation best practices will help ensure optimal performance:
Ground Preparation
- Clear the area of sharp objects that could damage skirting
- Level the ground where possible to minimize gaps
- Consider laying a vapor barrier on the ground first to reduce moisture
- In snowy areas, install skirting before the first snowfall to avoid ground freezing
Creating Effective Seals
- Ensure the top edge of skirting creates a tight seal against your RV
- Overlap sections by 2-3 inches minimum
- Use appropriate adhesives or tape designed for your specific skirting material
- Pay special attention to corners and irregular areas
- Create proper seals around slide-outs, which are particularly vulnerable
Securing Against Wind
- Use additional reinforcement in areas exposed to high winds
- Consider installing wind straps or bungee cords for flexible skirting
- Add extra weight to the bottom edge in windy locations
- Check and adjust tension regularly during windy periods
Ventilation Considerations
- Include at least 1-2 small ventilation openings to prevent moisture buildup
- Position vents away from prevailing winds
- Consider adding screened vents to prevent pest entry
- For propane appliances, ensure an adequate combustion air supply
Access Points
- Create access doors for storage compartments, utilities, and maintenance
- Reinforce the edges of access points to prevent tearing
- Consider using hook-and-loop fasteners for frequently accessed areas
- Label access points for convenience
Timing Considerations
- Install skirting before temperatures drop below 40°F for easier handling
- Allow extra time for first-time installation (subsequent setups go faster)
- Remove skirting once spring temperatures remain consistently above freezing
- Inspect and repair before storing for the season
Following these best practices will maximize the effectiveness of your camper skirting for winter, ensuring your camper stays warm and protected while extending its useful life.
Experience Premium Protection with Custom Skirting
Don’t compromise on your RV’s winter protection. Custom Skirting offers the ultimate solution for serious winter campers with our innovative “No-Snap, No-Gap” channel system that provides unmatched insulation and durability in even the harshest conditions.
Our team will blueprint and custom-tailor your RV skirting on-site, ensuring a perfect fit that effectively seals out snow, water, and wind better than any other product available. With over a decade of testing in the harshest northern climates, our skirting has proven itself as the premier choice for discerning RV enthusiasts.
The user-friendly design allows for quick setup and takedown, making it ideal for both permanent installations and travelers. Protect your investment and enhance your winter camping experience with Custom Skirting – the nation’s #1 RV skirting solution.
Get your custom RV skirting today and experience the difference for yourself!