
RV Interior Paint Ideas: Transform Your Mobile Home
Table of contents
- Understanding RV Interior Surfaces
- Popular RV Interior Color Schemes
- Preparation: The Key to a Successful RV Paint Job
- Step-by-Step RV Interior Painting Process
- Alternative and Complementary Renovation Options
- Real-Life RV Interior Paint Transformations
- Maintaining Your Newly Painted RV Interior
- Elevate Your RV Inside and Out
- Related Articles
Are you tired of the dark, dated interior of your RV? Looking for rv interior paint ideas to breathe new life into your mobile home? You’re not alone. Many RV owners find themselves wanting to personalize their space and create a more modern, homey atmosphere. A fresh coat of paint is one of the most cost-effective and impactful ways to transform your camper interior. Whether you’re seeking unique camper paint jobs, exploring rv interior color schemes, or gathering camper remodel rv interior paint ideas, this comprehensive guide will walk you through everything you need to know to successfully refresh your mobile home with paint.
Understanding RV Interior Surfaces
Before diving into RV interior paint ideas, it’s crucial to understand what you’re working with. RV interiors differ significantly from residential homes, which affects how you approach your painting project—especially when exploring camper remodel RV interior paint ideas that suit the unique materials and layouts of mobile living spaces.
Most RV walls consist of luan plywood with adhered wallpaper texture. Unlike drywall in traditional homes, these surfaces require special preparation and specific types of paint to ensure durability. RV cabinets are typically made from lightweight materials like particleboard with laminate or vinyl coverings, not solid wood.
The confined spaces of an RV present unique challenges when painting. You’ll be working around built-in fixtures, tight corners, and various surface materials all within a small area. Understanding these surfaces is essential for selecting the right products and techniques for your project.
Many RVs also feature vinyl wallboard panels that expand and contract with temperature changes. This movement means standard house paint may crack or peel over time. Additionally, high-use areas like kitchens and bathrooms face moisture and wear issues that require special consideration when exploring camper remodel RV interior paint ideas.
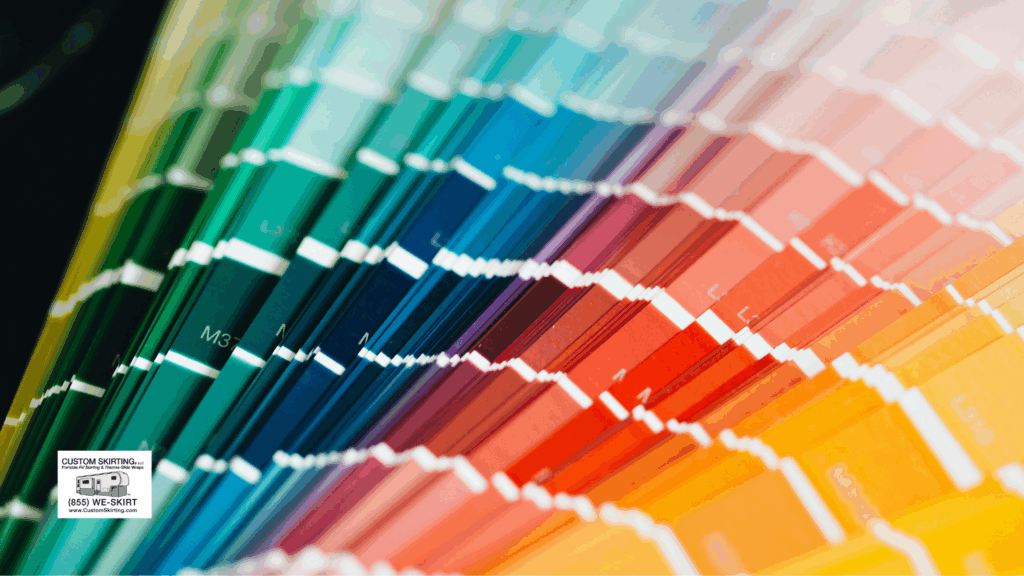
Popular RV Interior Color Schemes
Modern Farmhouse
The Modern Farmhouse aesthetic has become one of the most popular rv interior color schemes for good reason. This style creates a bright, airy feeling that makes small spaces feel larger while maintaining warmth and character.
For this look, focus on whites and creams for walls and upper cabinets. Sherwin Williams Pure White, Benjamin Moore Simply White, or Behr Ultra Pure White are excellent choices that provide a clean backdrop without feeling sterile. For contrast, incorporate black accents through hardware, light fixtures, or small painted details.
Neutral and Bright Palettes
Neutral colors are a staple in successful rv interior paint ideas because they maximize the feeling of space and light. Off-whites, creams, beige, and tan colors create a versatile backdrop that makes your RV feel more spacious.
Consider paints like Benjamin Moore’s Swiss Coffee, Sherwin Williams Alabaster, or Behr Silky White for a soft, warm approach to neutrals. These colors provide subtle depth without the starkness of pure white, making them ideal for small RV spaces.
Coastal and Nature-Inspired Colors
For RV owners who want to connect their interior to the outdoor environments they travel through, coastal and nature-inspired colors offer beautiful rv interior paint ideas. Soft blues, greens, and other nature-inspired hues create a relaxing atmosphere that complements the traveling lifestyle.
For walls, consider colors like Benjamin Moore’s Palladian Blue, Sherwin Williams Sea Salt, or Behr Watery. These soft, muted tones add color without overwhelming the space or making it feel smaller.
Two-Tone Color Strategies
One of the most effective rv interior paint ideas is the two-tone approach. This strategy typically involves using darker colors for lower cabinets with lighter colors for upper walls and ceilings. This creates visual interest while maintaining an open feeling.
For example, pair navy blue lower cabinets (like Benjamin Moore Hale Navy) with crisp white upper cabinets and walls. Or try dark gray lowers (Sherwin Williams Peppercorn) with light gray or white uppers. This approach grounds the space while allowing the eye to move upward, creating the illusion of height and openness.
Preparation: The Key to a Successful RV Paint Job
Assessing Your RV’s Interior Surfaces
Before gathering supplies for your camper interior paint ideas, thoroughly assess your RV’s current condition. Examine walls, cabinets, and trim for damage, peeling wallpaper, or areas that may need special attention.
Test existing surfaces to determine what type of paint or primer will adhere best. In an inconspicuous area, clean a small section, lightly sand it, apply primer, and then a small amount of your chosen paint. Wait 24 hours and test adhesion by pressing tape firmly to the surface and quickly removing it. If paint comes off with the tape, you’ll need a different approach or more thorough preparation.
Essential Supplies for RV Interior Painting
For successful rv interior paint ideas implementation, gather these essential supplies:
Cleaning and Preparation:
- TSP cleaner or TSP substitute
- Fine-grit sandpaper (220-grit)
- Sanding blocks or sponges
- Tack cloths
- Painter’s tape
- Drop cloths or plastic sheeting
- Putty knife and wood filler (for repairs)
Primers and Paints:
- Bonding primer specifically for difficult surfaces (PPG Gripper, Kilz Adhesion, or INSL-X Stix)
- High-quality paint in your chosen finish (satin or semi-gloss work best for RV interiors)
- Paint conditioner like Floetrol (helps reduce brush marks)
Application Tools:
- Quality synthetic brushes in various sizes
- Small foam rollers with smooth finish
- Paint trays and liners
- Extension pole for reaching ceilings
- Small detail brushes for tight areas
Investing in quality primers and paints is crucial for RV renovation. While it may cost more upfront, better products will provide superior adhesion, coverage, and durability—saving you time and preventing premature failure.
Proper Surface Preparation Techniques
The most critical factor in achieving professional-looking, durable results with your rv interior paint ideas is thorough preparation. Follow these steps:
- Remove hardware and fixtures: Take off cabinet doors, drawer fronts, handles, and any removable fixtures. Label everything for easy reassembly.
- Clean thoroughly: Use TSP or a TSP substitute to remove grease, dirt, and grime. This step is crucial—paint will not adhere to dirty surfaces. Rinse thoroughly and allow to dry completely.
- Address wallpaper: Remove any loose wallpaper borders, but do not attempt to remove the base wallpaper texture adhered directly to the luan plywood. Doing so can damage the substrate.
- Sand lightly: Using 220-grit sandpaper, lightly scuff all surfaces to be painted. The goal is not to remove finishes but to create a surface the primer can grip. Wipe away dust with tack cloths.
- Make repairs: Fill any holes, dents, or damage with appropriate wood filler. Sand repairs smooth when dry.
- Mask and protect: Use painter’s tape to protect edges, fixtures, and areas not being painted. Cover floors and furniture with drop cloths.
Remember that shortcuts during preparation will inevitably lead to disappointing results. The time invested in proper preparation will pay off with a professional-looking, long-lasting finish for your RV renovation.
Step-by-Step RV Interior Painting Process
Priming RV Surfaces
Priming is non-negotiable when implementing rv interior paint ideas. The primer creates the foundation for your paint job and determines whether the paint will adhere properly to your RV’s surfaces.
Apply a bonding primer specifically designed for difficult surfaces like laminate, vinyl, or glossy materials. Products like PPG Gripper, Kilz Adhesion, or INSL-X Stix are formulated to create a bond where regular primers would fail.
Apply two thin coats of primer rather than one thick coat. Allow the first coat to dry completely according to the manufacturer’s instructions before applying the second. This typically takes 2-4 hours, but may be longer in humid conditions.
Use a high-quality synthetic brush for edges and corners, and a small foam roller for larger flat surfaces. The foam roller will help create a smooth finish without texture. Apply primer with even, consistent strokes, working in small sections.
After the second coat of primer has dried completely (usually 24 hours), lightly sand any drips or imperfections with fine-grit sandpaper before moving on to paint application—an essential step in many camper remodel RV interior paint ideas.
Painting Techniques for Small Spaces
Painting in confined RV spaces requires different techniques than painting in a house. Here’s how to achieve professional results with your rv interior paint ideas:
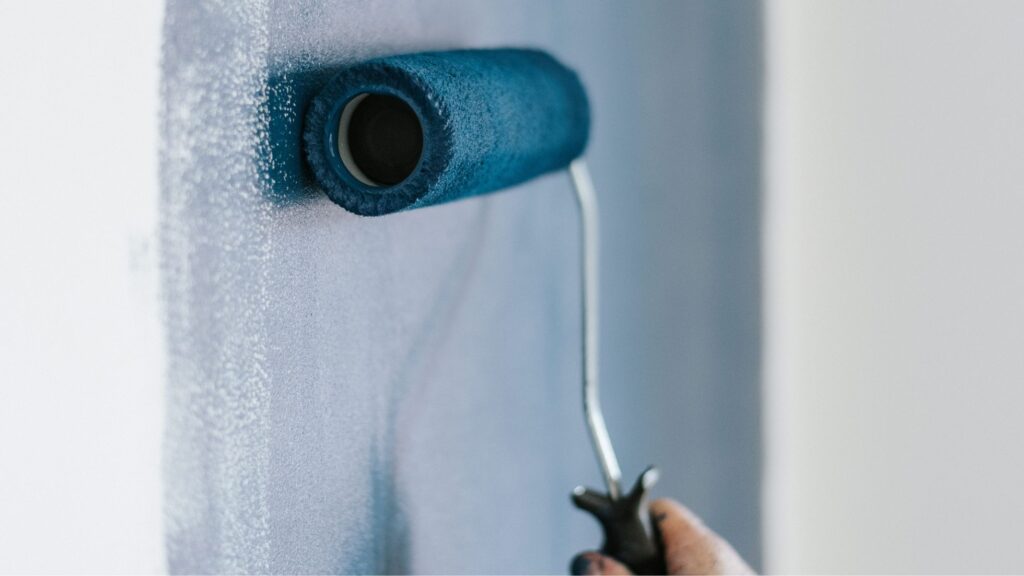
Brush vs. Sprayer: While paint sprayers can provide a smooth finish, they’re challenging to use in small RV spaces and require extensive masking and protection. For most DIYers, quality brushes and small foam rollers will provide excellent results with less setup and cleanup.
For walls and larger surfaces, use a 4-inch foam roller for the smoothest finish. Apply paint in thin, even coats, working in small sections and maintaining a wet edge to prevent lap marks. For cabinets and trim, a high-quality 2-inch angled brush will provide control and precision. These tips are essential when bringing your camper interior paint ideas to life with a clean, professional look.
Cabinet Painting Strategies
Cabinets are often the focal point of rv interior paint ideas, and they require special attention:
- Remove doors and hardware: Always remove cabinet doors and hardware before painting. This allows for easier application and a smoother finish. Number doors and their corresponding locations to ensure proper reinstallation.
- Choose the right paint: For cabinets that will see heavy use, choose a durable paint specifically formulated for cabinets or trim. Satin or semi-gloss finishes are ideal as they’re easier to clean and more resistant to moisture and wear.
- Apply paint in thin layers: Cabinet surfaces show imperfections more readily than walls. Apply paint in very thin, even coats using a foam roller or brush. Allow each coat to dry completely before applying the next.
- Consider a protective topcoat: For added durability, apply a water-based polyurethane topcoat over painted cabinets. This provides extra protection against scratches, moisture, and wear, particularly important in high-use areas like kitchens.
- Allow proper curing time: While paint may feel dry to the touch within hours, allow cabinets to cure for several days before reattaching hardware and returning items to cabinets. Full curing can take up to 30 days, during which time gentle handling is recommended.
Special Considerations for RV Bathrooms and Kitchens
Bathrooms and kitchens present unique challenges when implementing rv interior paint ideas due to moisture, temperature fluctuations, and heavy use:
For these areas, choose paints with mildew-resistant properties and moisture resistance. Many major paint brands offer kitchen and bath-specific formulations that contain mildewcides and provide enhanced durability in humid environments.
Preparation is even more critical in these spaces. Thoroughly clean surfaces with a degreaser, paying special attention to areas near cooking appliances where airborne grease may have accumulated. In bathrooms, ensure surfaces are free of soap residue and mildew before priming. Proper prep is essential for executing your favorite camper interior paint ideas with lasting results.
Alternative and Complementary Renovation Options
Vinyl Paneling Refresh
If painting isn’t the right solution for all areas of your RV, consider these alternative approaches to complement your rv interior paint ideas:
Vinyl paneling can be refreshed without paint using products specifically designed for RV interiors. Genesis Products and other manufacturers offer renovation kits that include new vinyl panels that can be installed over existing walls.
These panels typically install with adhesive and are cut to fit your specific space. They provide a completely new look without the need for paint and are often more resistant to the expansion and contraction that occurs in RVs due to temperature changes.
Incorporating Wallpaper and Decals
Modern peel-and-stick wallpapers offer exciting possibilities to complement your rv interior paint ideas. These temporary wallpapers are ideal for accent walls or small areas where you want to add pattern or visual interest without committing to paint.
Look for wallpapers specifically marketed as removable or temporary, as these typically use less aggressive adhesives that won’t damage underlying surfaces when removed. Brands like RoomMates, NuWallpaper, and Tempaper offer options designed for easy application and removal.
Cabinet Hardware and Accessories
One of the most impactful ways to enhance your newly painted cabinets is with new hardware. This simple change can dramatically alter the look of your RV interior, complement your chosen color scheme, and tie in with your overall camper interior paint ideas.
For modern farmhouse looks, consider matte black or oil-rubbed bronze pulls and knobs. For coastal themes, brushed nickel or chrome hardware provides a clean, fresh appearance. Leather pulls offer a unique touch for more rustic or bohemian aesthetics.
Beyond hardware, consider complementary accessories like new light fixtures, faucets, and textiles that coordinate with your new paint colors. These finishing touches will complete your renovation and create a cohesive look throughout your RV living space.
Real-Life RV Interior Paint Transformations
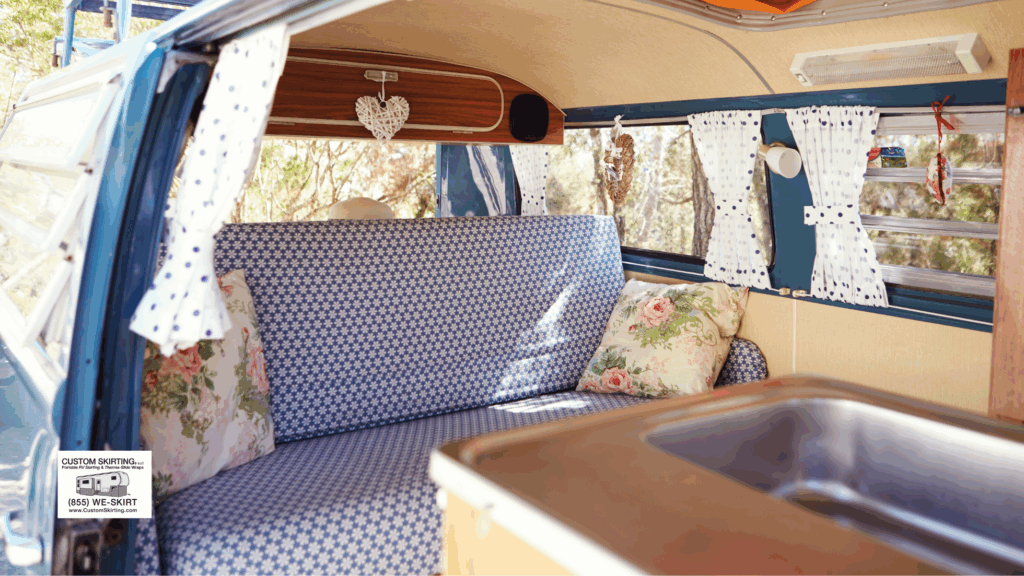
Before and After: Light and Bright Makeover
One of the most dramatic RV interior paint ideas transformations involves taking a dark, wood-dominated interior to a light, bright space. Consider this real-life example:
A 2005 fifth-wheel with dark cherry cabinets, brown wallpaper, and beige countertops felt cave-like and dated. The owners transformed it by painting all wall surfaces with Benjamin Moore Simply White in an eggshell finish after applying INSL-X Stix primer. They painted the cabinets with Benjamin Moore Advance paint in White Dove with a satin finish for slight contrast against the walls.
The preparation process involved thorough cleaning with TSP, light sanding of all surfaces, and two coats of primer. The most challenging aspect was working around built-in fixtures and ensuring even coverage in corners and edges—common hurdles when executing camper interior paint ideas.
Before and After: Two-Tone Cabinet Renovation
Two-tone approaches offer sophisticated rv interior paint ideas that add visual interest while maintaining an open feeling. Here’s a real example:
A 2012 motorhome with all-oak cabinets and beige walls felt dated and monotonous. The owners applied a two-tone strategy, painting lower cabinets in Sherwin Williams Naval (a deep navy blue) and upper cabinets in Sherwin Williams Pure White. Walls were painted in Sherwin Williams Agreeable Gray, a light neutral that complemented both cabinet colors and brought balance to the overall RV interior color schemes.
For the cabinets, they used a brush-on bonding primer followed by Cabinet Coat paint, which provides a factory-like finish that’s highly durable. The lower cabinets required three coats of the navy paint for even coverage, while the white uppers needed only two coats.
Before and After: Creative Color Accents
Sometimes subtle color accents can have as much impact as full-scale painting when implementing camper remodel RV interior paint ideas. Consider this example:
A newer RV with neutral factory finishes lacked personality and felt generic. Rather than repainting everything, the owners kept the existing white cabinets and beige walls but added strategic color accents. They painted the bathroom door in Behr Blueprint (a medium blue) and added a matching accent wall in the bedroom.
They also painted the kitchen backsplash area in a coordinating lighter blue (Behr Watery) to tie the color scheme together. These small color additions required minimal paint and preparation but dramatically personalized the space.
Maintaining Your Newly Painted RV Interior
After implementing your RV interior paint ideas and choosing the perfect RV interior color schemes, proper maintenance will ensure your hard work continues to look fresh for years to come. Here’s how to care for your newly painted surfaces:
Allow paint to fully cure before heavy cleaning—this typically takes 30 days for most paints. During this curing period, avoid scrubbing or using harsh cleaners on the painted surfaces.
For routine cleaning, use a soft microfiber cloth with mild soap and water. Avoid abrasive cleaners, magic erasers, or scrubbing brushes that can damage the paint finish. When following camper remodel RV interior paint ideas, it’s especially important to protect your fresh paintwork. For cabinets, a solution of water with a small amount of dish soap works well for removing fingerprints and light soil.
Expect your RV paint job to last 3–5 years before it might need refreshing, depending on use and care. Areas exposed to more sunlight, moisture, or heavy use may show wear sooner. Proper RV maintenance of all systems helps protect your interior from damage that could affect your paint and even alter the look of your RV interior color schemes over time.
To extend the life of your paint job, consider installing RV window coverings that block UV rays, which can cause paint to fade over time. Also, address any moisture issues promptly to prevent damage to painted surfaces.
Elevate Your RV Inside and Out
While you’re enhancing your RV’s interior with fresh paint, don’t overlook the importance of protecting what’s underneath. At Custom Skirting, we complement your interior renovation efforts with custom-tailored RV skirting that adds comfort, storage protection, and energy efficiency to your mobile home.
Our exclusive “No-Snap, No-Gap” channel system provides superior protection against harsh weather conditions, keeping your RV warmer in winter and cooler in summer. Just as you’ve personalized your interior with carefully chosen colors, our team will blueprint and custom-tailor your skirting on-site for a perfect fit that enhances both function and appearance.
With over a decade of testing in the harshest northern climates, Custom Skirting has emerged as the nation’s #1 RV skirting solution. Plus, our user-friendly design allows for quick setup and easy storage when you’re ready to hit the road again.
Complete your RV transformation from top to bottom—get Custom Skirting today and experience the difference for yourself!