
How to Charge RV Batteries Safely and Effectively
Table of contents
Knowing how to charge RV batteries properly is crucial for ensuring a smooth and enjoyable camping experience. Whether you’re a weekend traveler or a full-time RVer, understanding how to charge a camper battery efficiently can save you from power failures, costly replacements, and frustrating downtime. Without a reliable power source, essential RV functions—like lighting, refrigeration, and climate control—can be compromised. This comprehensive guide covers how to charge camper battery setups using different methods, explains the role of battery types in charging efficiency, and highlights essential safety considerations. Since RVs vary in design and usage, the right charging approach depends on your specific setup and travel style. Read on to learn how to charge an RV battery safely and effectively.
Understanding RV Battery Types
Different RV battery types have distinct charging characteristics. Knowing your battery type is key to choosing the right charging method and ensuring longevity.
Lead-Acid Batteries
Traditional flooded lead-acid (FLA) batteries are affordable and widely available but require regular maintenance. Charging lead-acid batteries correctly is essential to prevent sulfation and capacity loss.
- Charging characteristics: Slower charging times, requiring a three-stage process (bulk, absorption, and float)
- Maintenance: Regular water level checks and proper ventilation to prevent gas buildup
- Lifespan: Typically 3-5 years, depending on maintenance and usage
AGM Batteries
Absorbed Glass Mat (AGM) batteries offer a maintenance-free alternative to lead-acid options with improved durability.
- Charging characteristics: Charges faster than lead-acid batteries and withstands deep discharges better
- Maintenance: No water refilling required; resistant to vibration and leakage
- Lifespan: 5-7 years, with proper charging and care
Lithium (LiFePO4) Batteries
Lithium Iron Phosphate (LiFePO4) batteries are the top choice for modern RVs, offering high efficiency and longevity.
- Charging characteristics: Charges faster and maintains consistent voltage output
- Maintenance: No maintenance required; built-in Battery Management System (BMS) for protection
- Lifespan: 10+ years with proper care, making them cost-effective long-term
RV Battery Charging Methods
There are multiple ways to charge an RV battery, each with its own benefits and limitations. Many RVers use a combination of these methods to ensure reliable power. Additionally, knowing how to change a camper battery is essential for maintaining your RV’s power system.
Shore Power Charging
Using campground hookups or home outlets is a reliable way to keep batteries charged.
- Equipment needed: Power converter and onboard charger
- Process: Plug the RV into a 120V AC power source, allowing the converter to regulate voltage and charge the batteries
- Pros: Consistent power source, ideal for extended stays
- Cons: Requires access to an electrical outlet and may take longer to charge batteries fully
Generator Charging
Portable and onboard generators provide power when shore power isn’t available.
- Equipment needed: Generator, RV power cord, and appropriate adapters
- Process: Start the generator and connect it to the RV’s electrical system to charge batteries via the converter
- Pros: Works anywhere, provides backup power for off-grid camping
- Cons: Noisy, fuel-dependent, and less eco-friendly than solar power
Solar Power Charging
Harnessing solar energy is a sustainable and cost-effective solution for RV battery charging.
- Equipment needed: Solar panels, charge controller (PWM or MPPT), and wiring
- Process: Solar panels convert sunlight into DC power, which is regulated by the charge controller to safely charge the batteries
- Pros: Renewable energy, great for off-grid camping, minimal operating costs
- Cons: Less effective in cloudy conditions, requires upfront investment in equipment
Vehicle Alternator Charging
Many RVs can charge their batteries using the tow vehicle’s alternator while driving.
- Equipment needed: DC-to-DC charger (for efficiency) or direct alternator connection
- Process: The alternator generates power while the engine runs, transferring charge to the RV’s house batteries
- Pros: Convenient for travel days, passive charging method
- Cons: Slow charging, may not fully charge deep cycle batteries, potential strain on alternator
Wind Power Charging (Optional)
Wind turbines can serve as a supplemental charging method in windy locations.
- Equipment needed: Small wind turbine, charge controller, and wiring
- Process: Wind energy is converted into electricity, regulated by a charge controller to avoid overcharging batteries
- Pros: Works well in consistent wind conditions, eco-friendly
- Cons: Requires stable wind speeds, less effective in most RVing scenarios
Essential Charging Equipment
Having the right charging equipment ensures efficient power management, extends battery life, and optimizes energy usage in your RV. Additionally, knowing how to change a camper battery is essential for maintaining a reliable and effective charging system. Below are key components to consider.
Power Converters and Inverter Chargers
- Power Converters: These devices transform 120V AC shore power into 12V DC, which is essential for charging your RV’s house batteries and running DC-powered appliances such as lights, fans, and water pumps. Modern converters often include smart charging technology to optimize battery health.
- Inverter Chargers: These units serve a dual function by charging your batteries and converting stored DC power into AC power for appliances like microwaves, TVs, and laptops. Many models feature pure sine wave output, providing cleaner power that’s safe for sensitive electronics.
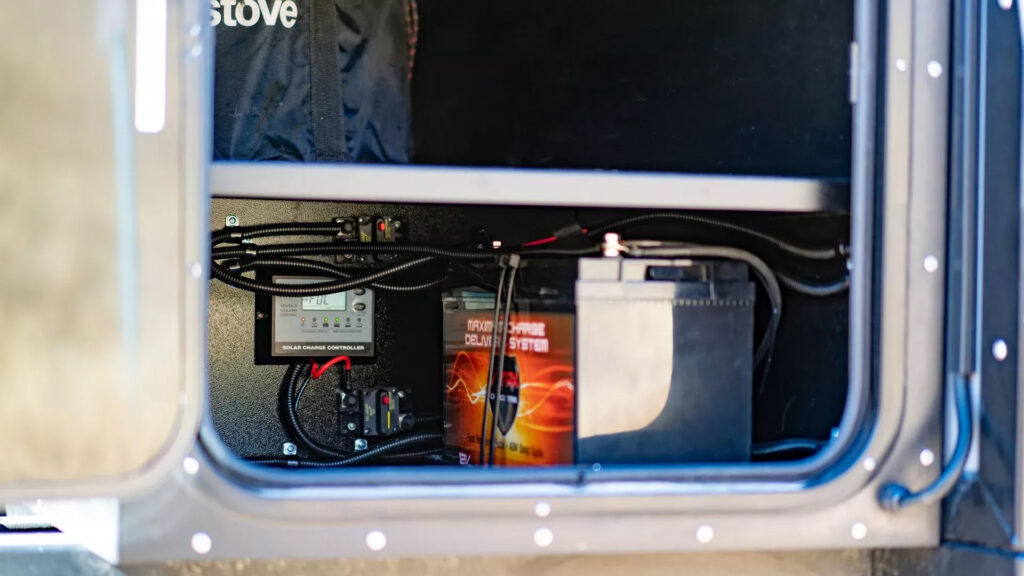
Solar Charge Controllers
A solar charge controller regulates the energy flow from solar panels to your RV batteries, preventing overcharging and ensuring maximum efficiency. There are two main types:
- PWM (Pulse Width Modulation) Controllers: A budget-friendly option, ideal for smaller solar systems. While effective, PWM controllers are less efficient and work best with low-power solar setups.
- MPPT (Maximum Power Point Tracking) Controllers: These offer higher efficiency by adjusting voltage and current levels to maximize energy conversion. Best for larger solar arrays, MPPT controllers can increase charging efficiency by up to 30% compared to PWM models.
DC-DC Battery Chargers
A DC-DC charger enhances battery charging from the RV’s alternator, ensuring efficient energy transfer while preventing voltage drops. This is particularly useful when charging lithium or AGM batteries, as it provides a stable charge rate and avoids overloading the alternator.
- Ideal for vehicles with smart alternators that reduce voltage output when the engine is running.
- Helps maintain optimal charge levels for house batteries during long drives.
- Some models offer multi-stage charging, improving battery longevity.
By selecting the right combination of power converters, inverter chargers, solar controllers, and DC-DC chargers, you can create a reliable and efficient charging system for your RV, ensuring power availability wherever your adventures take you..
Battery Charging Safety Guidelines
Charging RV batteries improperly can cause hazards like overheating or damage. Follow these safety tips.
General Safety Precautions
- Charge in well-ventilated areas (especially for lead-acid batteries)
- Secure connections with appropriate wire gauges
- Use fuses and circuit breakers for protection
Avoiding Overcharging and Undercharging
- Use smart chargers to prevent overcharging
- Monitor charge levels with battery monitors
- Follow the correct charging stages (bulk, absorption, float)
Cold Weather Charging Considerations
- Keep batteries insulated in extreme cold
- Use temperature-compensating charge controllers
- Store lithium batteries in temperature-controlled environments
Optimizing Your RV Battery Charging System
Assessing Your Power Needs
Understanding your power requirements is the first step in designing an effective charging system.
- Calculate Daily Energy Consumption:
- List all appliances and devices used in your RV.
- Note their wattage and estimated daily usage time.
- Determine Battery Capacity:
- Choose a battery bank that provides at least 1.5x your daily energy needs to prevent deep discharges.
- Lead-acid batteries should not be discharged below 50%, while lithium batteries can safely go down to 20% or lower.
- Select an Appropriate Charging Method:
- Consider how frequently you’ll have access to shore power, solar energy, or a generator.
Combining Charging Methods
Using multiple charging sources ensures reliability and efficient energy replenishment, especially during extended boondocking trips.
- Solar Power:
- Ideal for off-grid camping and reducing generator reliance.
- Works best with MPPT charge controllers to maximize solar efficiency.
- Larger battery banks benefit from higher-wattage solar panels (400W+).
- Alternator Charging (DC-DC Chargers):
- Charges the house battery bank while driving.
- DC-DC chargers optimize charging efficiency and prevent alternator overload.
- Useful for RVs with smart alternators, which may limit voltage output.
- Shore Power & Converters:
- A progressive dynamics smart converter adjusts voltage levels for faster and safer charging.
- Shore power is most reliable when staying at campgrounds with 30A or 50A connections.
- Generators:
- A backup power source for cloudy days or heavy energy use.
- Best paired with a high-output battery charger for quick recharging.
- Inverter generators provide cleaner power and are more fuel-efficient.
Upgrading Your Charging System
Enhancing your RV’s battery and charging setup can significantly improve energy efficiency, reduce weight, and extend battery life.
- Switch to Lithium Batteries:
- Higher energy density and longer lifespan (up to 10 years vs. 3-5 years for lead-acid).
- Faster charging and deeper discharge capabilities.
- Weighs 50% less than traditional AGM or lead-acid batteries.
- Compatible with high-efficiency MPPT solar controllers and smart chargers.
- Upgrade to an MPPT Solar Controller:
- Converts more solar energy into usable power compared to PWM controllers.
- Allows flexible solar panel configurations (series or parallel).
- Increases efficiency by 20-30%, especially in varying sunlight conditions.
- Consider a High-Efficiency Inverter Charger:
- A pure sine wave inverter charger provides clean AC power for sensitive electronics.
- Select an inverter with built-in battery management for seamless charging.
- Look for models that support lithium batteries for optimized performance.
By assessing your energy needs, integrating multiple charging sources, and upgrading to advanced battery and charging technologies, you can create a powerful and efficient RV charging system tailored to your adventures.
Understanding how to charge a camper battery properly ensures your RV remains powered for all your adventures. Whether using shore power, solar, generators, or alternators, choosing the right method based on your battery type and travel style maximizes efficiency and battery lifespan.
Keep Your RV Powered & Protected with Custom Skirting
Optimize Your RV’s Power & Comfort with Custom Skirting!
Charging your RV batteries safely and effectively is just one part of keeping your rig road-ready—protecting your RV from extreme temperatures is just as important. With Custom Skirting, you can minimize energy loss, reduce battery strain, and maintain a stable interior climate, no matter where your travels take you.
Our “No-Snap, No-Gap” channel system provides unmatched insulation against wind, snow, and water, keeping your RV warm in winter and cool in summer. Plus, our custom on-site blueprinting ensures a perfect fit every time. Designed for durability and convenience, our skirting moves with you, so you’re always prepared for the next adventure.
Extend your battery life, protect your RV, and travel with confidence!