RV Skirting DIY: Keeping Your RV Warm for Under $250
Table of contents
- What is RV Skirting?
- Understanding RV Skirting: When and Why You Need It
- Comparing DIY RV Skirting Options
- Materials and Tools Needed for DIY RV Skirting
- Step-by-Step Guide to Installing Vinyl RV Skirting
- Step-by-Step Guide to Installing Foam Board RV Skirting
- Monitoring Effectiveness and Troubleshooting
- Additional Winter RV Protection Tips
- Real-World Results and Cost Savings
- Storing and Reusing Your DIY RV Skirting
- How Much Does RV Skirting Cost?
- Ready for Professional-Grade Protection Without the DIY Hassle?
- Related Articles
Embarking on the nomadic journey of RV living is an exhilarating adventure, offering the allure of endless horizons and the comfort of a home on wheels. However, as winter descends, the need for a warm refuge within your mobile abode becomes paramount. This guide unfolds the secrets of crafting winter RV skirting ideas and pallet-inspired marvels through RV skirting DIY. It’s not just about insulation; it’s about infusing your unique style into your mobile haven.
In this guide, we delve into the art of DIY RV skirting, blending practicality and creativity to ensure your RV reflects both functionality and personal flair. Explore winter RV skirting ideas that marry warmth with ingenuity, and discover the charm of pallet-inspired solutions that transform your RV into a cozy retreat.
What is RV Skirting?
RV Skirting is a protective barrier designed to enhance the insulation and overall comfort of your home on wheels. This crucial component creates a shield around the base of your RV, acting as a barrier between the exterior environment and the underside of your vehicle. Essentially, it is a tailored enclosure that wraps around the lower portion of your RV, contributing to both practical functionality and aesthetic appeal. For a budget-friendly and creative solution, many travelers explore pallet RV skirting ideas to customize their setup with recycled materials.
The primary function of RV skirting is to prevent cold air from infiltrating the underside of your RV, ensuring a warmer and more comfortable interior, especially during colder seasons. By effectively sealing off the space beneath the RV, skirting helps in maintaining a consistent temperature inside, reducing the strain on heating systems. This is particularly crucial in winter, when plummeting temperatures can pose challenges to the overall comfort and functionality of your RV.
RV skirting works by creating a barrier that minimizes heat loss, prevents drafts, and protects your RV’s plumbing from freezing. Among various options, pallet RV skirting ideas offer an affordable and creative way to build this barrier. It acts as a valuable insulator, not only enhancing the living conditions inside your mobile home but also contributing to energy efficiency. In essence, RV skirting is a practical and versatile solution that plays a pivotal role in creating a comfortable and well-protected environment within your beloved mobile abode.
Understanding RV Skirting: When and Why You Need It
RV skirting is a game-changer for any avid traveler seeking both comfort and practicality. The use of RV skirting becomes particularly crucial in colder seasons and winter escapades. The primary purpose is to create a protective barrier around the base of your RV, shielding it from the harsh elements and enhancing the overall living experience.
In winter, when temperatures plummet, RV skirting acts as a vital insulator, preventing cold air from seeping underneath the vehicle. Using pallet RV skirting ideas can provide an affordable and creative way to add this protection. This not only keeps the interior warmer but also reduces the strain on heating systems, contributing to energy efficiency (reducing energy costs up to 50%). The benefits extend beyond temperature regulation; RV skirting also plays a pivotal role in safeguarding your RV’s plumbing from freezing, a common concern in colder climates.
Beyond winter, RV skirting proves valuable in various scenarios. During hot summer months, it helps maintain a cooler interior by blocking out excessive heat. Additionally, it acts as a barrier against dust, debris, and pests, ensuring a cleaner and more enjoyable living space. Whether you’re navigating chilly winters or scorching summers, RV skirting emerges as a versatile and indispensable accessory, elevating your mobile home experience with enhanced insulation, energy efficiency, and overall comfort. For those looking to maximize these benefits, exploring creative RV skirting ideas can help you find the perfect solution tailored to your needs and style.
Comparing DIY RV Skirting Options
Vinyl Skirting
Billboard vinyl or heavy-duty tarps represent the industry standard for RV skirting DIY projects. This material is durable, reusable, and relatively easy to work with. A complete vinyl skirting setup typically costs approximately $200-250, making it an affordable alternative to professional installation.
Advantages:
- Excellent flexibility for uneven terrain
- Superior water resistance
- Reusable for multiple seasons
- Relatively lightweight and easy to store
Disadvantages:
- May tear in extreme winds if not properly secured
- Requires proper anchoring to prevent flapping
- Can be challenging to create access points
You can source billboard vinyl from advertising companies that often sell used billboards at discounted rates. Alternatively, heavy-duty tarps from hardware stores work well, though they may not be as durable as dedicated billboard vinyl.
Foam Board Insulation
Rigid foam insulation boards represent one of the most popular diy rv skirting options due to their excellent insulation properties and affordability. Typically using 1-inch thick, 4×8 sheets, this method costs around $100-150 total, making it the most budget-friendly option.
Advantages:
- Excellent insulation value (R-value)
- Easy to cut and shape to fit your specific RV
- Lightweight and manageable for one person
- Creates a rigid barrier that stands up to moderate winds
Disadvantages:
- Can break in high winds
- Less durable for multiple seasons
- May require replacement after one or two winters
- More challenging to store than vinyl
For optimal results, look for extruded polystyrene foam boards (often pink or blue) rather than the white beaded foam, as they offer better moisture resistance and durability. This type of insulation is discussed in detail in what to know about foam board insulation.
Plywood/Particle Board
Wood materials like plywood or particleboard offer another option for RV skirting DIY enthusiasts. While sturdy and providing good insulation, these materials come with significant drawbacks.
Advantages:
- Very sturdy and wind-resistant
- Good insulation properties
- Can be painted to match your RV
- Durable when properly treated
Disadvantages:
- Heavy and difficult to transport
- May warp with moisture exposure
- More expensive ($150-300, depending on wood quality)
- Requires tools for cutting and installation
- Challenging to store between seasons
If choosing wood materials, be sure to treat them with water-resistant sealants to prevent rot and mold. Consider using pressure-treated lumber for ground contact areas for maximum durability.
Alternative Materials
Several other diy rv skirting options exist, each with unique advantages:
Plastic Sheeting:
- Very affordable ($50-100)
- Lightweight and easy to work with
- Less durable than other options
- Requires frequent adjustments
Hay/Straw Bales:
- Excellent insulation properties
- Inexpensive in rural areas
- Natural and biodegradable
- Potential for moisture issues and attracting pests
- Not suitable for frequent travelers
Inflatable Skirting Systems:
- Easy to install and remove
- Excellent insulation
- More expensive than other DIY options
- Potential for punctures
Pallet RV skirting ideas:
- Free or very low cost
- Sturdy and wind-resistant
- Can be combined with insulation materials
- Requires disassembly or sourcing of pallets
- Heavier and more labor-intensive
Choosing the right material depends on factors such as climate, budget, mobility, reuse, and desired longevity. For comprehensive protection and insulation, vinyl stands out as one of the best materials for winter RV skirting ideas. However, for those looking for an eco-friendly and cost-effective option, pallet RV skirting ideas offer a creative alternative. Its durability and resistance to the elements, along with its mobility, make vinyl a wise investment, ensuring that your RV remains comfortable and well-protected throughout various seasons and conditions.
Materials and Tools Needed for DIY RV Skirting
For Vinyl Skirting
- Billboard vinyl or heavy-duty tarps (enough to cover the perimeter)
- Grommets and grommet installation tool
- Adhesive hooks, snaps, or Velcro strips
- Stakes, sandbags, or bricks for anchoring
- HVAC foil tape for seams
- Scissors or a utility knife
Approximate cost: $200-250
For Foam Board Skirting
- Foam insulation boards (1″ thick recommended)
- Foil duct tape or specialized foam board tape
- Concrete blocks or bricks for anchoring
- Utility knife or foam cutting tool
- Measuring tape
- Marker for marking cut lines
Approximate cost: $100-150
Basic Tools for Any Method
- Measuring tape
- Box cutter/utility knife
- Heavy-duty scissors
- Cleaning supplies (alcohol for surface prep)
- Work gloves
- Weather-resistant markers
- Optional: temperature monitoring system
Before starting your RV skirting DIY project, it’s worth checking what RV sizes, length, width, and height you’re working with to accurately calculate material needs.
Step-by-Step Guide to Installing Vinyl RV Skirting
Planning and Measuring
- Measure the entire perimeter of your RV, including slide-outs when extended.
- Measure the ground clearance at multiple points (it often varies).
- Add 6-12 inches to the height for securing to the RV and creating ground contact.
- Create a simple diagram marking locations of access points, utilities, and slide-outs.
- Calculate the total vinyl needed, adding 10-15% extra for overlaps and mistakes.
Remember to account for uneven terrain and plan for at least 2-4 inches of material to rest on the ground for proper sealing.
Preparing the Vinyl
- Lay out your vinyl on a clean, flat surface.
- Transfer your measurements, marking cut lines with a weather-resistant marker.
- Cut the vinyl into appropriate sections using sharp scissors or a utility knife.
- Install grommets along the top edge, spacing them approximately 12-18 inches apart.
- Create special pieces for challenging areas like stairs, slide-outs, and the gooseneck on fifth wheels.
For fifth-wheel owners, the gooseneck area requires special attention. Check out what is a fifth wheel RV for specific considerations when skirting this type of RV.
Attaching to the RV
- Clean the attachment areas on your RV with alcohol to ensure good adhesion.
- Install adhesive hooks, snaps, or Velcro strips along the RV’s bottom edge, aligning with your grommet spacing.
- Hang the vinyl panels, starting from one corner and working your way around.
- Overlap panels by 2-3 inches at seams, securing with HVAC foil tape or heavy-duty clips.
- For slide-outs, create separate pieces that can be attached and removed as needed.
If your RV has an awning rail, you might be able to use it for attaching the top of your skirting, saving time and creating a cleaner look. Learn more about types of RV awnings that might help with your installation.
Securing the Bottom Edge
- Once all panels are hung, adjust them to ensure even ground contact.
- Secure the bottom edge using one of these methods:
- Tent stakes through grommets (add bottom grommets if needed)
- Sandbags placed at regular intervals
- Bricks or concrete blocks
- Soil or snow piled along the edge
- Pay special attention to corners and areas with uneven terrain.
- Create a continuous seal against the ground to prevent drafts.
For areas with significant snow, you can allow snow to build up against the skirting for additional insulation, but be sure the weight doesn’t pull down your attachment points—this is one of many practical winter RV skirting ideas to enhance cold-weather protection.
Creating Access Points
- Identify areas requiring regular access (storage compartments, utilities, etc.).
- Create flaps or doors using these methods:
- Zippered openings (sew or use adhesive zipper kits)
- Velcro strips for removable sections
- Magnetic strips for easy access
- Snap systems for secure but accessible panels
- For the gooseneck area on fifth wheels, create a separate piece that can be removed when hitching/unhitching.
- Label each access point for easy identification.
Proper access points are crucial for RV maintenance, especially during winter when you might need to check systems regularly.
Step-by-Step Guide to Installing Foam Board RV Skirting
Measuring and Cutting
- Measure the perimeter and ground clearance of your RV as described above.
- Purchase foam boards in appropriate quantities (typically 4’x8′ sheets).
- Mark cutting lines on the foam boards using a straight edge and a marker.
- Cut the foam board using a utility knife or specialized foam cutting tool:
- Score deeply along your cutting line
- Snap the board along the scored line
- Cut through any remaining material
- Test fit pieces before final installation.
When working with foam board, cut in a well-ventilated area and wear gloves to protect your hands from rough edges.
Positioning and Securing
- Position the first foam board at a corner of your RV.
- Secure the top edge of the RV using one of these methods:
- Foil duct tape (works well in moderate temperatures)
- Adhesive Velcro strips
- Specialized foam board adhesive
- Place concrete blocks, bricks, or sandbags at the bottom edge to hold it in place.
- Continue around the perimeter, positioning each board tightly against the previous one.
- Tape all seams between boards using foil duct tape to create a continuous barrier.
For a more finished look, you can cover the foam board with vinyl or tarps, combining the benefits of both materials.
Special Considerations
- For slide-outs, create custom-fit pieces that can be removed when retracting the slide.
- Cut access holes for utilities and storage compartments:
- Mark the location precisely
- Cut slightly smaller than needed
- Finish edges with tape to prevent crumbling
- For stairs, create a box-like structure using multiple pieces.
- Reinforce areas vulnerable to wind damage with additional tape or supports.
- Consider adding reflective foil tape to all seams for better insulation and durability.
Understanding how RV slide-outs work can help you create more effective skirting solutions for these challenging areas.
Monitoring Effectiveness and Troubleshooting
Once your RV skirting DIY project is complete, monitoring its performance is crucial:
- Install thermometers or temperature sensors in the skirted area to track effectiveness.
- Check for drafts by feeling around seams and edges on cold, windy days.
- Look for these common issues and their solutions:
Tears or Punctures in Vinyl:
- Repair with vinyl repair kits or heavy-duty tape
- Reinforce vulnerable areas with additional material
Detachment from RV:
- Clean the surface and reapply with a stronger adhesive
- Add more attachment points in problem areas
- Consider mechanical fasteners in extreme conditions
Moisture Buildup:
- Add small vents in strategic locations
- Use moisture absorbers in the enclosed space
- Ensure proper drainage away from the RV
Wind Damage:
- Reinforce with additional anchoring
- Add cross-bracing for foam board installations
- Consider wind breaks for extremely exposed sites
Regular inspection throughout the winter season is essential, especially after storms or significant temperature changes, and exploring winter RV skirting ideas can help you choose solutions that withstand harsh weather. Learning how to keep moisture out of your RV during winter will help you manage condensation issues that might arise with skirting.
Additional Winter RV Protection Tips
While RV skirting DIY projects provide excellent underbelly protection, comprehensive winter preparation includes:
Window Insulation:
- Apply shrink plastic film to windows
- Use bubble wrap on non-opening windows
- Install thermal curtains for additional insulation
Plumbing Protection:
- Use RV antifreeze in gray/black tanks
- Insulate water hoses with pipe insulation or heat tape
- Keep interior cabinets open in extreme cold to allow heat circulation
Heating Optimization:
- Use space heaters safely to supplement furnace heating
- Consider a small ceramic heater in the enclosed skirted area
- Install vent covers to prevent heat loss
Humidity Management:
- Use dehumidifiers to prevent condensation
- Monitor humidity levels with an inexpensive hygrometer
- Leave cabinet doors open to improve air circulation
Roof Protection:
- Clear snow accumulation regularly
- Check RV roof maintenance guidelines for winter-specific care
These winter RV skirting ideas work together with your skirting to create a comprehensive winter protection system that keeps your RV comfortable and prevents costly damage.
Real-World Results and Cost Savings
The effectiveness of RV skirting diy projects is proven by real-world experiences:
- Temperature differences of 15-30°F between skirted and unskirted areas are commonly reported
- Many RVers report reducing propane usage from 3-4 tanks per week to just 1 tank
- Electric heating costs typically decrease by 20-30%
- Protection from frozen pipes can save thousands in potential repair costs
Let’s compare the financial aspects:
DIY Skirting Costs:
- Vinyl method: $200-250
- Foam board method: $100-150
- Plywood method: $150-300
Professional Skirting Costs:
- Custom vinyl skirting: $1,500-2,500
- Factory-installed skirting: $2,000-3,000
The payback period through energy savings typically ranges from 2-4 weeks of winter camping, making DIY RV skirting one of the most cost-effective improvements for cold-weather RVing.
Storing and Reusing Your DIY RV Skirting
Proper care extends the life of your RV skirting diy project:
Vinyl Skirting Storage
- Clean with mild soap and water before storage
- Allow to dry completely
- Fold carefully, avoiding sharp creases
- Store in a cool, dry place away from direct sunlight
- Place in storage bags or containers to prevent pest damage
Foam Board Storage
- Clean off any dirt or debris
- Label each piece according to its position
- Stack flat in a dry location
- Place heavy boards on the bottom, lighter pieces on top
- Cover with a tarp to protect from moisture and UV damage
Repairs Before Storage
- Patch any holes in vinyl with repair tape or patches
- Replace damaged foam board sections
- Reinforce weak points for next season
- Replace worn grommets or attachment hardware
With proper care, well-maintained DIY skirting—especially when inspired by smart winter RV skirting ideas—can last 3-5 seasons for vinyl and 2-3 seasons for foam board, further increasing your cost savings compared to professional options.
For those considering long-term RV living, check out the complete guide on full-time RV living for additional insights on seasonal preparations.
How Much Does RV Skirting Cost?
The cost of DIY RV skirting can vary based on the materials you choose and the size of your RV. On average, expect to spend anywhere from $500 to $1,000. Depending on your material use and complication of your RV, one can spend several hours and even up to several days installing it. While this initial investment may seem significant, the long-term benefits in terms of energy savings and protection make it a worthwhile expense for any avid RVer.
In conclusion, DIY RV skirting is not just a practical solution; it’s an investment in comfort, protection, and the longevity of your mobile home. Whether you’re exploring RV skirting ideas for insulation, aesthetic upgrades, or seasonal prep, roll up your sleeves, gather your materials, and embark on the journey of enhancing your RV experience with personalized skirting that reflects your style and meets your specific needs.
Ready for Professional-Grade Protection Without the DIY Hassle?
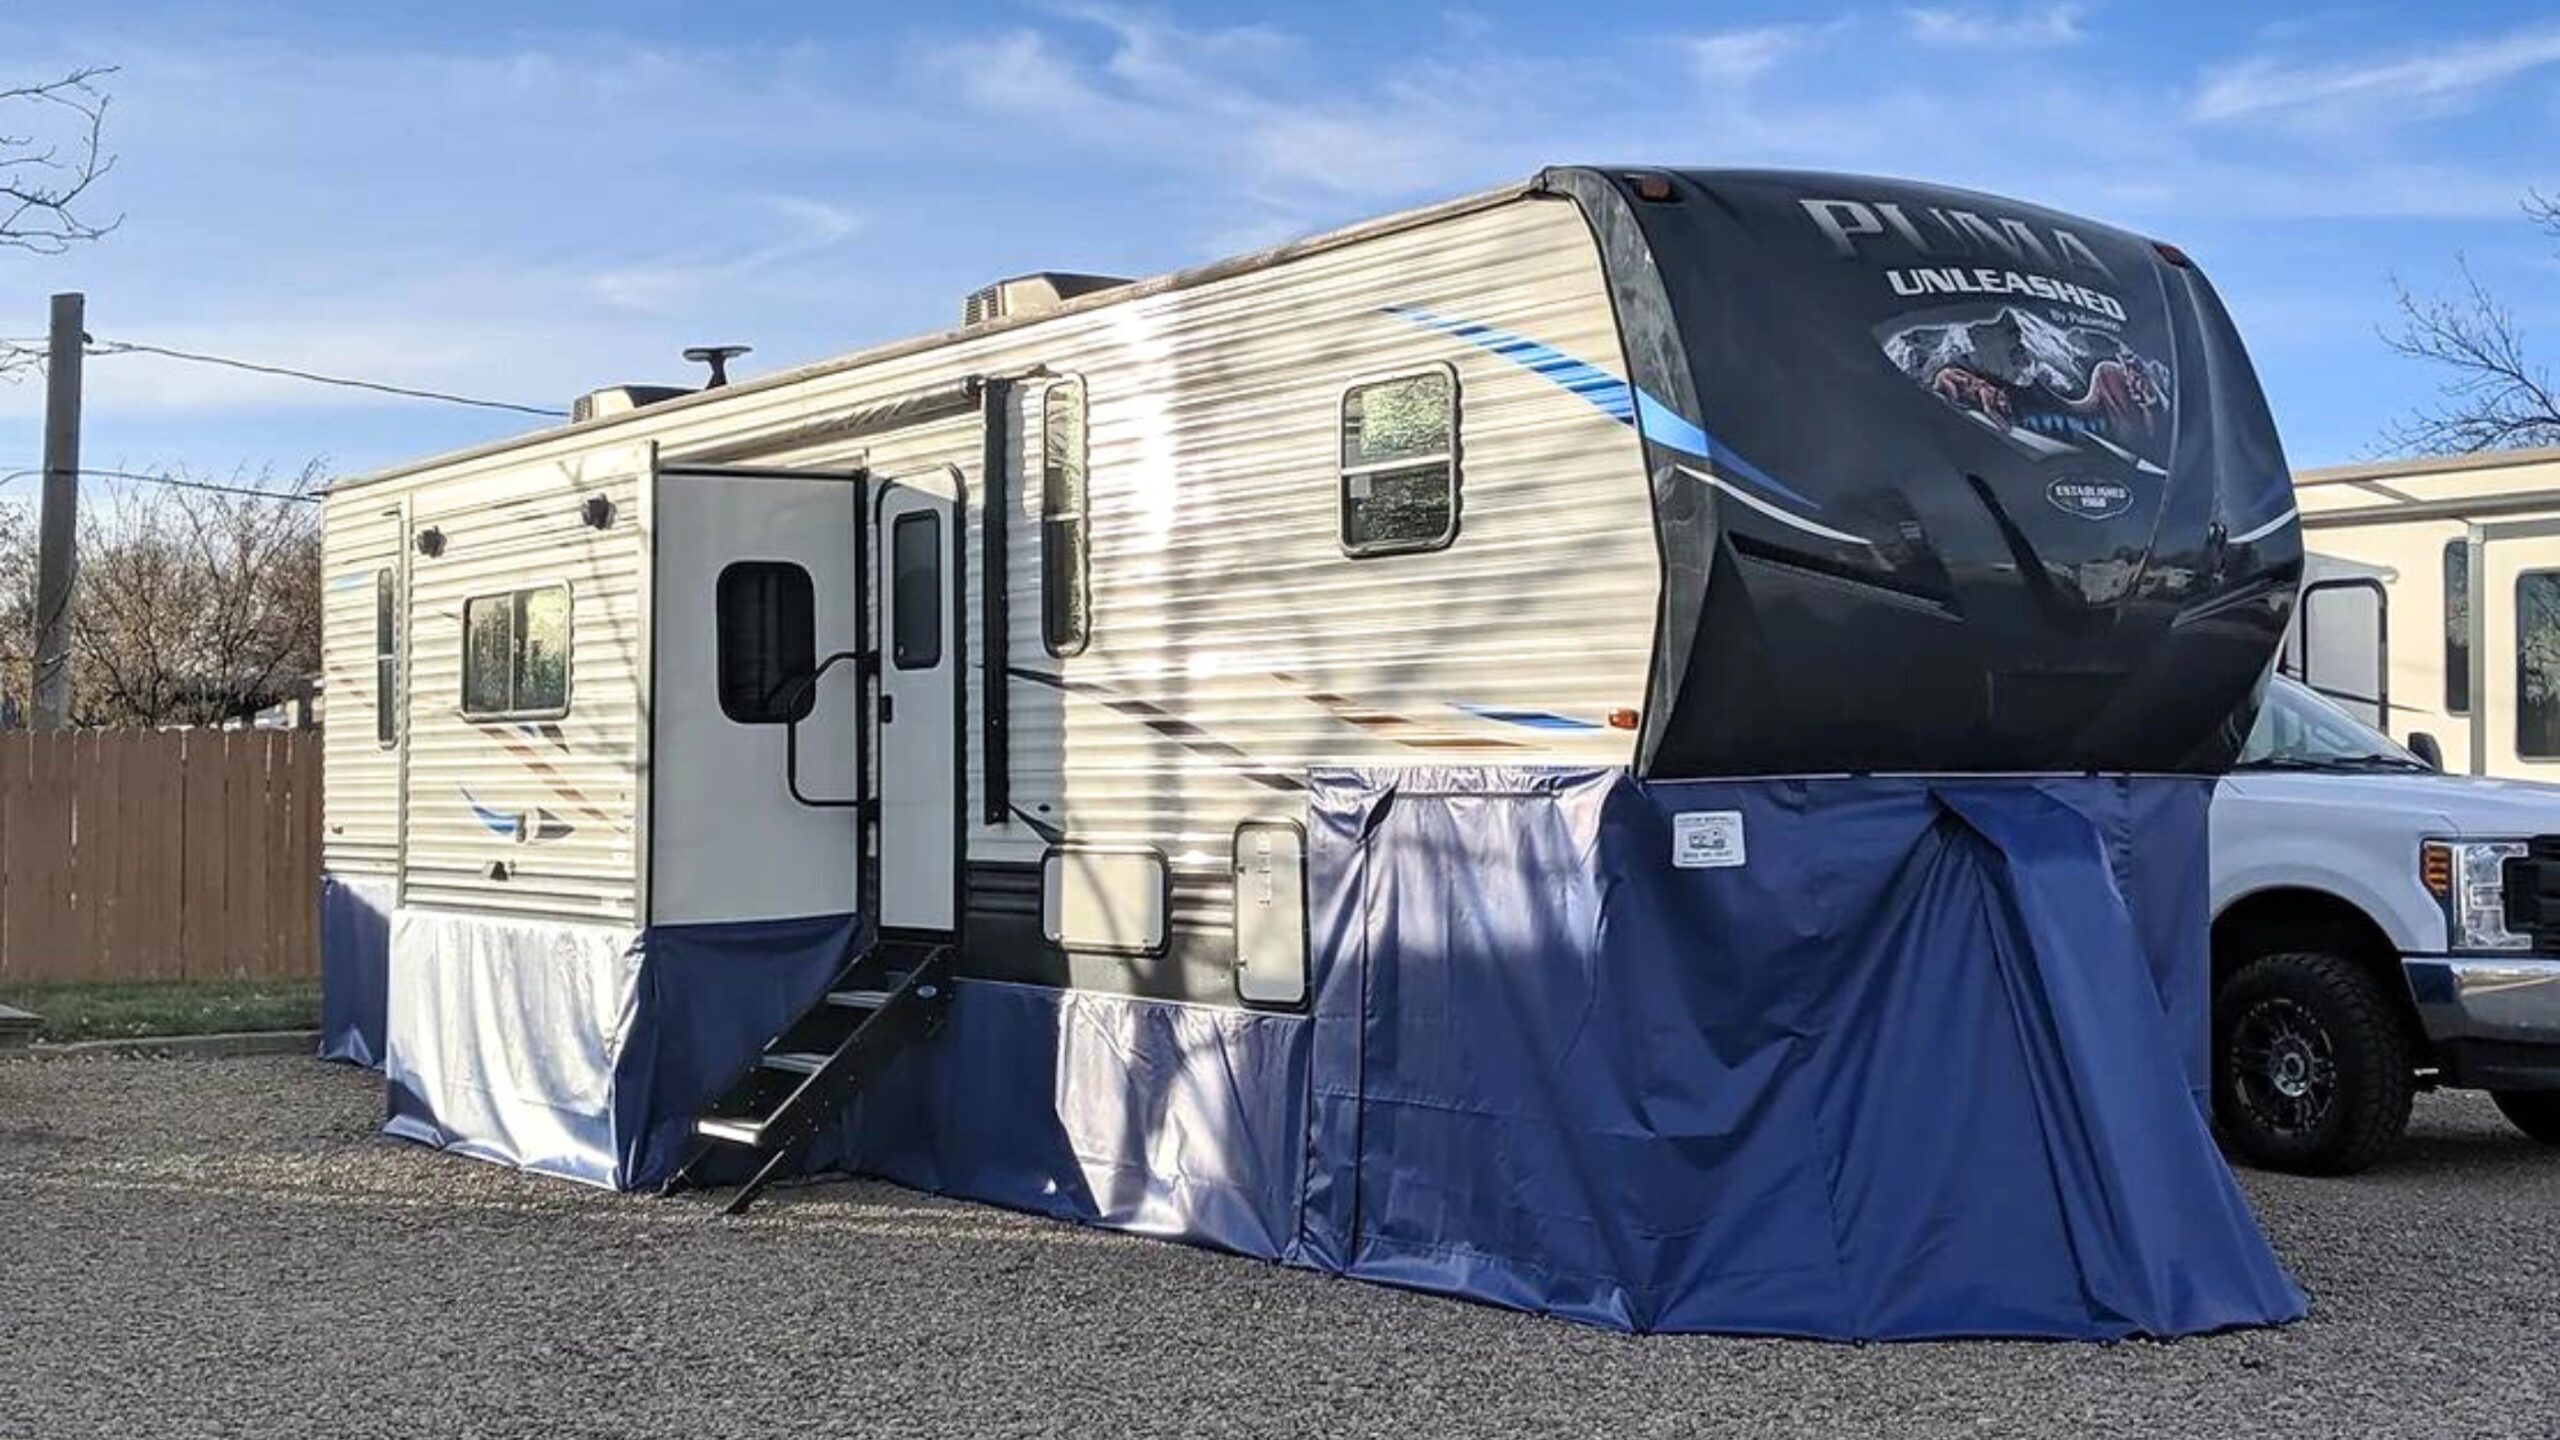
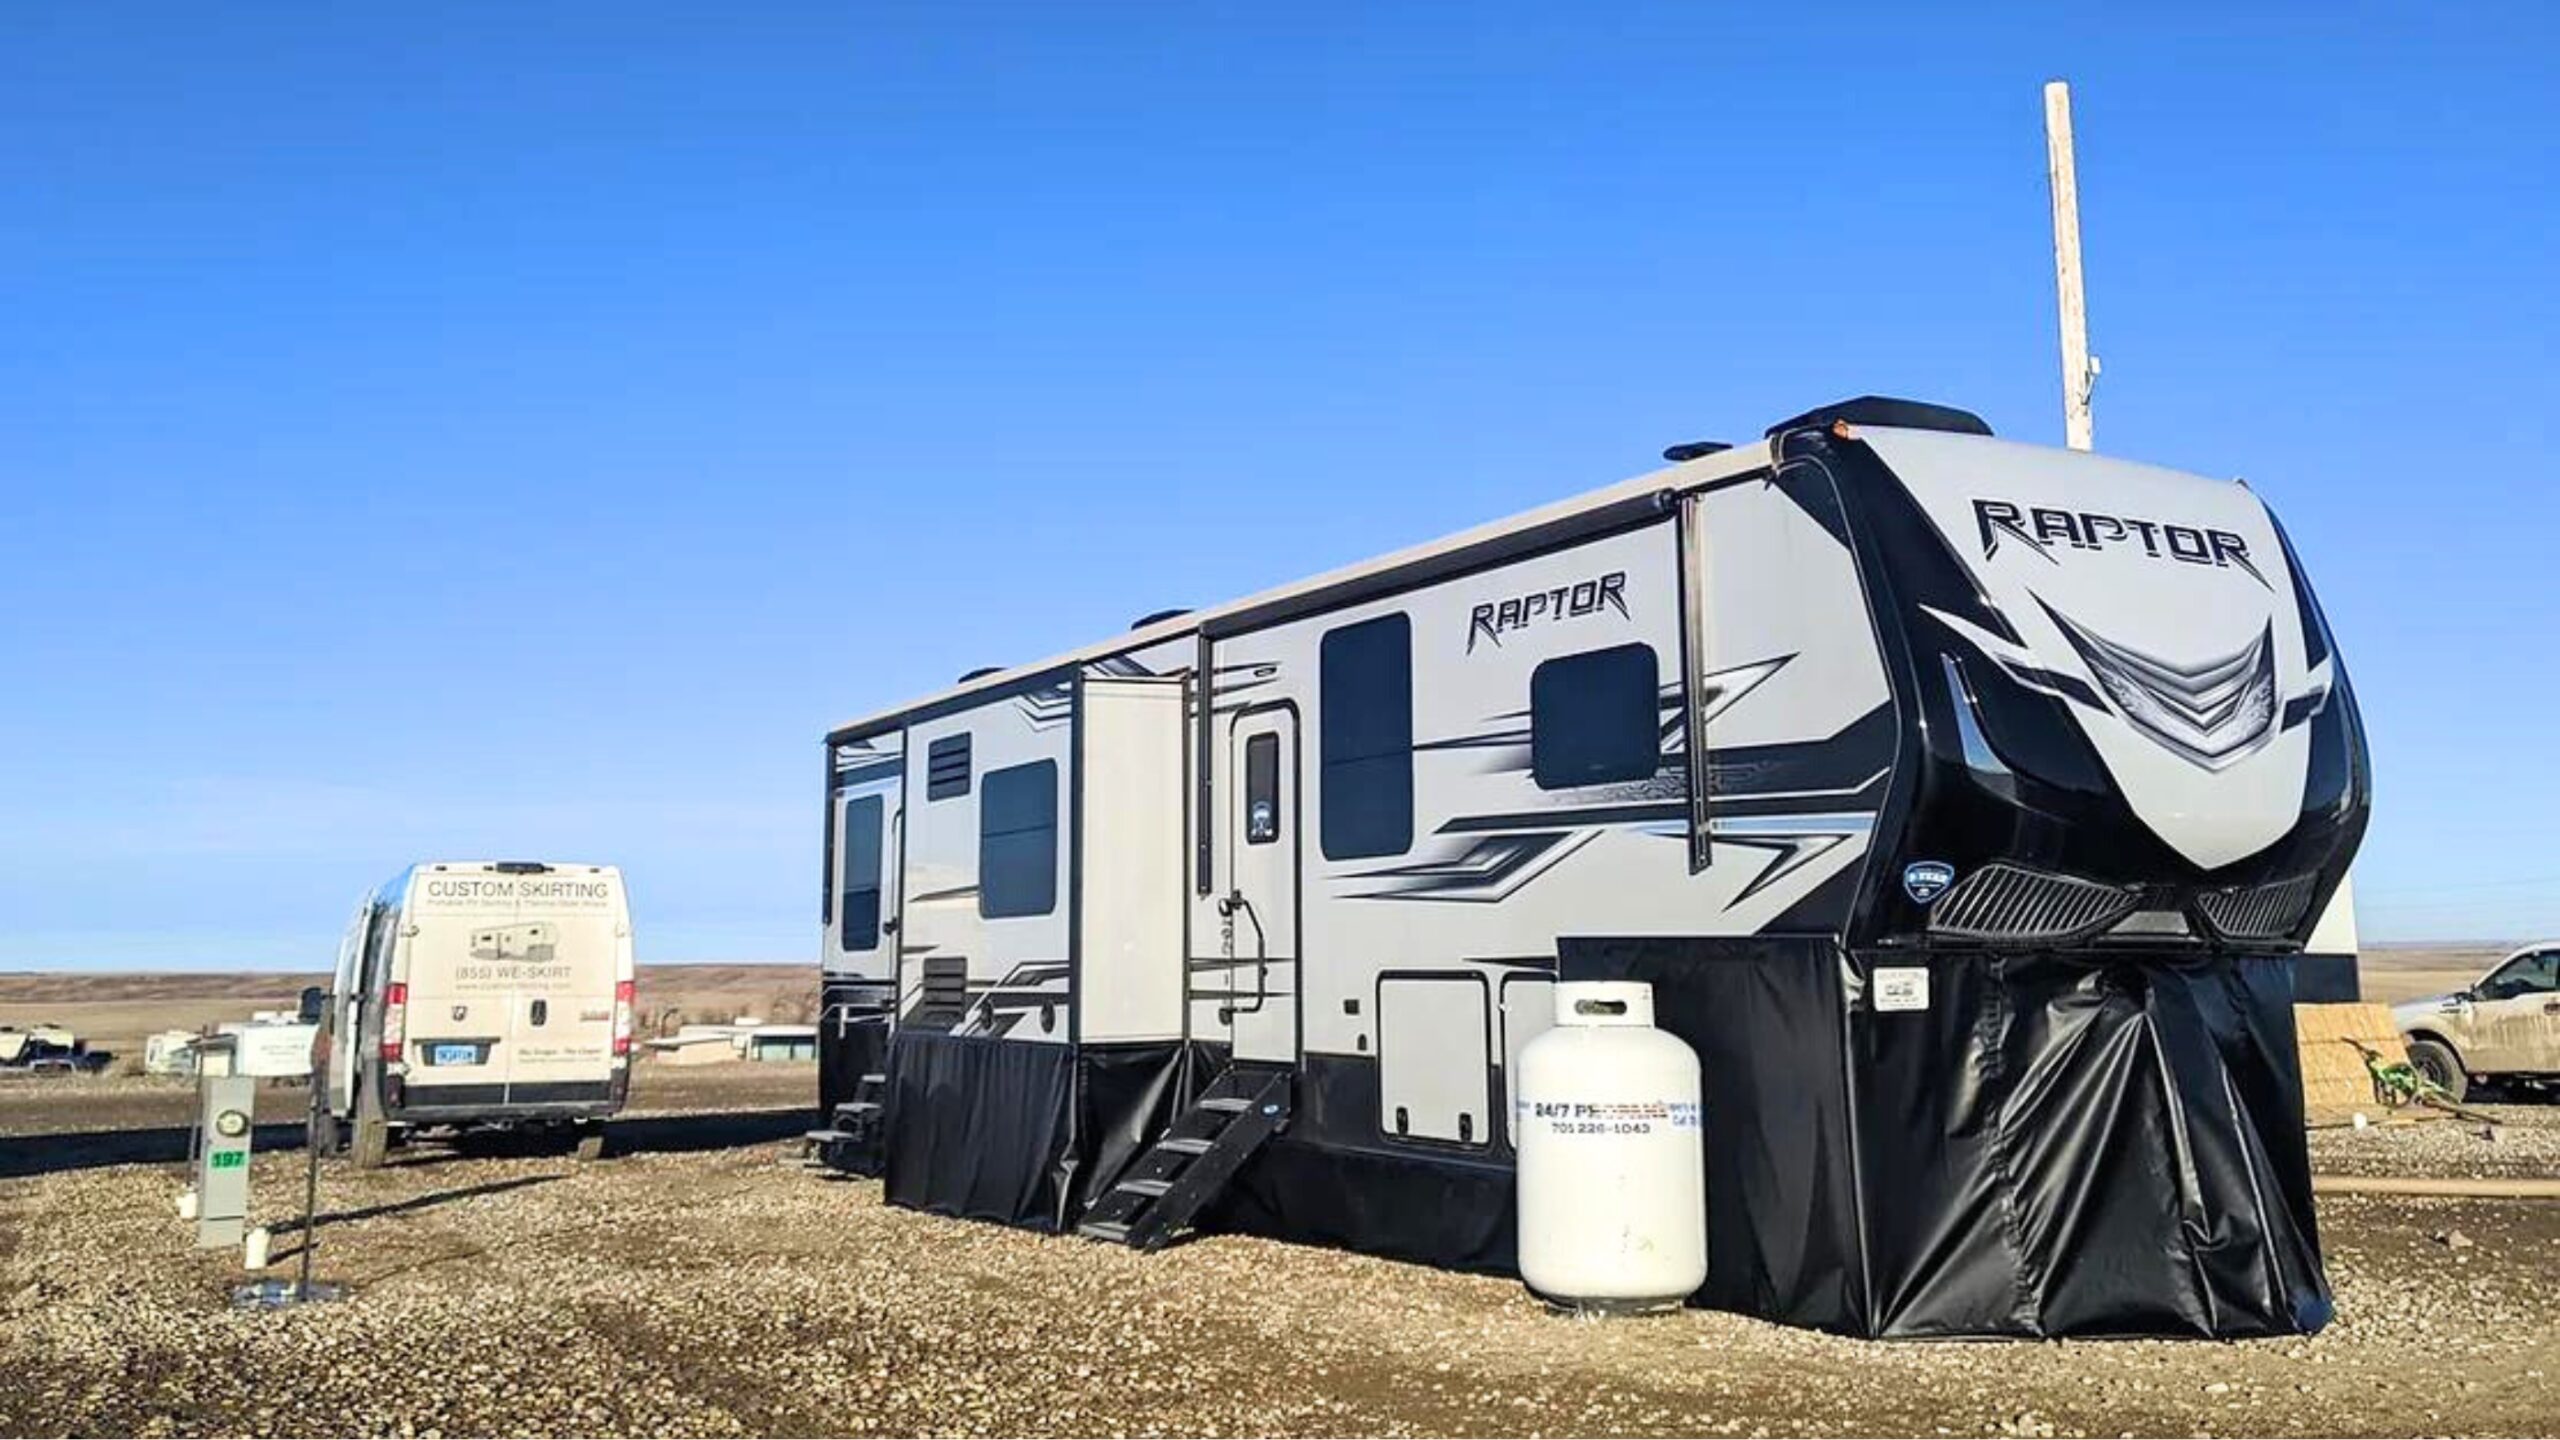
While DIY skirting offers significant savings, some RVers prefer the convenience, durability, and professional appearance of custom solutions. At Custom Skirting, we understand the challenges of winter RVing and have developed the nation’s #1 RV skirting solution.
Our team blueprints and custom-tailors your RV skirting on-site, ensuring a flawless fit that provides unparalleled protection. Our exclusive “No-Snap, No-Gap” channel system seals out water, snow, and wind more effectively than any other product on the market.
With over a decade of testing and improvements in the harshest winter conditions across the northern United States and Canada, our skirting has emerged as the top choice for serious RV enthusiasts. Plus, our user-friendly design allows for quick setup and can move with you wherever your adventures take you.
Experience the difference professional skirting makes—contact Custom Skirting today for a solution that combines convenience, durability, and superior protection!