How RV Plumbing Works: Complete Guide
Table of contents
Understanding your RV plumbing system is essential for any successful camping adventure. Whether you’re a weekend warrior or full-time RVer, knowing how your RV plumbing works, which RV plumbing parts you need, and how to maintain your RV water system can mean the difference between a relaxing getaway and a frustrating ordeal. This comprehensive guide covers everything from RV plumbing system basics to advanced troubleshooting, ensuring you have the knowledge to handle your RV plumbing fittings and components with confidence, no matter where your travels take you.
Understanding RV Plumbing Basics
RV plumbing system basics differ significantly from residential systems in several key ways. While home plumbing connects to municipal water and sewer lines with constant pressure and drainage, RV plumbing operates using a combination of onboard storage tanks and occasional hookups to external sources.
The RV plumbing system basics consists of two primary subsystems:
- Fresh Water System: Stores and delivers clean water for drinking, cooking, and bathing
- Waste Water System: Collects and stores used water until it can be properly disposed of
These systems work together but remain completely separate to prevent contamination. Most modern RVs use PEX (cross-linked polyethylene) tubing instead of rigid copper or PVC pipes found in homes. PEX is flexible, freeze-resistant, and can withstand the constant movement and vibration experienced in a mobile environment.
RV plumbing fittings are typically made of plastic rather than metal to reduce weight and prevent corrosion. These components are designed to be lightweight yet durable enough to handle the unique demands of mobile living.
The Fresh Water System
Fresh Water Tanks and Storage
Fresh water tanks are the heart of your RV water system, with capacities varying significantly based on RV size:
- Class A motorhomes: 75-100 gallons
- Fifth wheels: 50-90 gallons
- Class C motorhomes: 35-60 gallons
- Class B vans: 15-40 gallons
These tanks are typically located in protected areas of the RV, often underneath the floor or in basement compartments. In colder climates, tanks may be insulated or equipped with heating elements to prevent freezing, which is an important part of understanding RV plumbing system basics.
Most fresh water tanks are made from FDA-approved polyethylene plastic that won’t impart taste or odor to your water. Tank level indicators use sensors to provide readings on your control panel, though these can become inaccurate over time due to mineral buildup on the sensors.
Regular cleaning and maintenance of your fresh water tank is essential for safe drinking water and accurate level readings. Most manufacturers recommend sanitizing the tank at least twice a year with a bleach solution, another key step in RV plumbing system basics.
Water Sources and Filling Methods
RVs can receive water in two primary ways:
- City Water Connection: Connects directly to a pressurized water source at a campground or RV park
- Gravity Fill: Allows you to fill the onboard fresh water tank through a dedicated port
For city water connections, you’ll need:
- A food-grade drinking water hose (white or blue, never use a standard garden hose)
- A pressure regulator to protect your RV plumbing from excessive pressure
- A water filter to improve taste and remove contaminants
When connecting to city water, always use a pressure regulator rated for RV use. Municipal water systems can deliver pressure exceeding 100 PSI, while most RV plumbing systems are designed for 40-50 PSI maximum.
For boondocking (camping without hookups), you’ll need to locate water sources along your route. Many truck stops, rest areas, and RV-friendly businesses offer potable water. Apps like AllStays and Campendium can help locate these resources.
Water Pumps and Pressure Systems
When not connected to city water, your RV’s 12-volt water pump pressurizes the plumbing system. These pumps typically deliver 3-5 gallons per minute at pressures between 40-60 PSI.
Most RV water pumps are demand-type pumps that activate automatically when pressure drops (like when you open a faucet) and shut off when pressure builds back up. The pump is controlled by a pressure switch that can be adjusted to your preference.
Some RVs include an accumulator tank—a small pressure vessel that reduces pump cycling by storing pressurized water. This extends pump life and reduces noise by preventing the pump from activating every time you need a small amount of water.
Water pumps typically last 8-10 years with proper maintenance. Signs that your pump may need replacement include:
- Unusual noise or vibration
- Failure to build pressure
- Frequent cycling on and off
- Leaks around the pump body
Regular maintenance includes checking connections for leaks, cleaning the inlet strainer, and ensuring proper voltage to the pump.
Water Filtration Systems
Filtering your RV water is crucial for both taste and safety. Campground water can vary dramatically in quality, and even municipal water may contain chlorine, sediment, or other contaminants.
Common RV water filtration options include:
- Inline filters: Simple carbon filters that attach to your water hose
- Under-sink filters: Provide filtered water at specific faucets
- Whole-RV systems: Filter all water entering the RV
For serious water quality concerns, consider multi-stage filtration systems that address specific contaminants like:
- Sediment (dirt, rust, particles)
- Chemical contaminants (chlorine, pesticides)
- Biological hazards (bacteria, cysts)
Most RV water filters require replacement every 3-6 months, depending on water quality and usage. Some high-quality RV water filter systems can last an entire camping season.
Hot Water Systems
RVs typically use one of two hot water systems:
- Tank-style water heaters: Store 6-12 gallons of hot water
- Tankless (on-demand) water heaters: Heat water instantly as needed
Traditional tank heaters can run on propane, electricity (120V AC), or both. They take 15-30 minutes to heat water but provide a steady supply until depleted. Tankless systems provide unlimited hot water but require more precise water pressure and flow rate.
Maintenance for tank-style heaters includes:
- Replacing the anode rod annually (if equipped)
- Flushing the tank to remove sediment
- Checking the pressure relief valve
- Inspecting gas lines and connections
For winterizing, both systems must be properly drained or protected with antifreeze to prevent freeze damage. Many RVers choose to upgrade their water heaters to tankless models for increased efficiency and endless hot water.
The Waste Water System
Understanding Gray and Black Water Tanks
The waste water system in your RV consists of two separate holding tanks:
- Gray water tank: Collects water from sinks and showers
- Black water tank: Collects waste from the toilet
These tanks are typically located underneath the RV and range in capacity from 15-50+ gallons depending on the size of your RV. Black tanks are usually smaller than gray tanks since they fill more slowly.
Both tanks have sensors to indicate fill levels, though black tank sensors frequently become inaccurate due to debris buildup. Modern monitoring systems like SeeLevel use external sensors that read through the tank wall for more reliable readings.
Tank treatments are essential for black tanks to control odors and break down waste. These products contain bacteria and enzymes that digest solid waste and toilet paper. Gray tanks may also benefit from treatments to prevent odors from food particles and soap scum.
RV Toilet Systems
RV toilets differ significantly from home toilets in both design and function. Most use minimal water (about a pint per flush) and rely on gravity to move waste into the black tank directly below.
Common RV toilet types include:
- Gravity flush: Most common, uses water and gravity
- Vacuum flush: Uses vacuum pressure for efficient flushing
- Cassette: Self-contained removable waste tank
- Composting: No water required, separates liquid and solid waste
Proper toilet use is crucial for preventing clogs and odors. Always use RV-specific toilet paper that breaks down easily, and never flush anything other than waste and toilet paper. Keep the toilet valve closed when not in use to prevent odors from entering the living space.
Common toilet problems include leaking seals, stuck flush valves, and clogged waste pipes. Most issues can be resolved with basic maintenance and occasional deep cleaning.
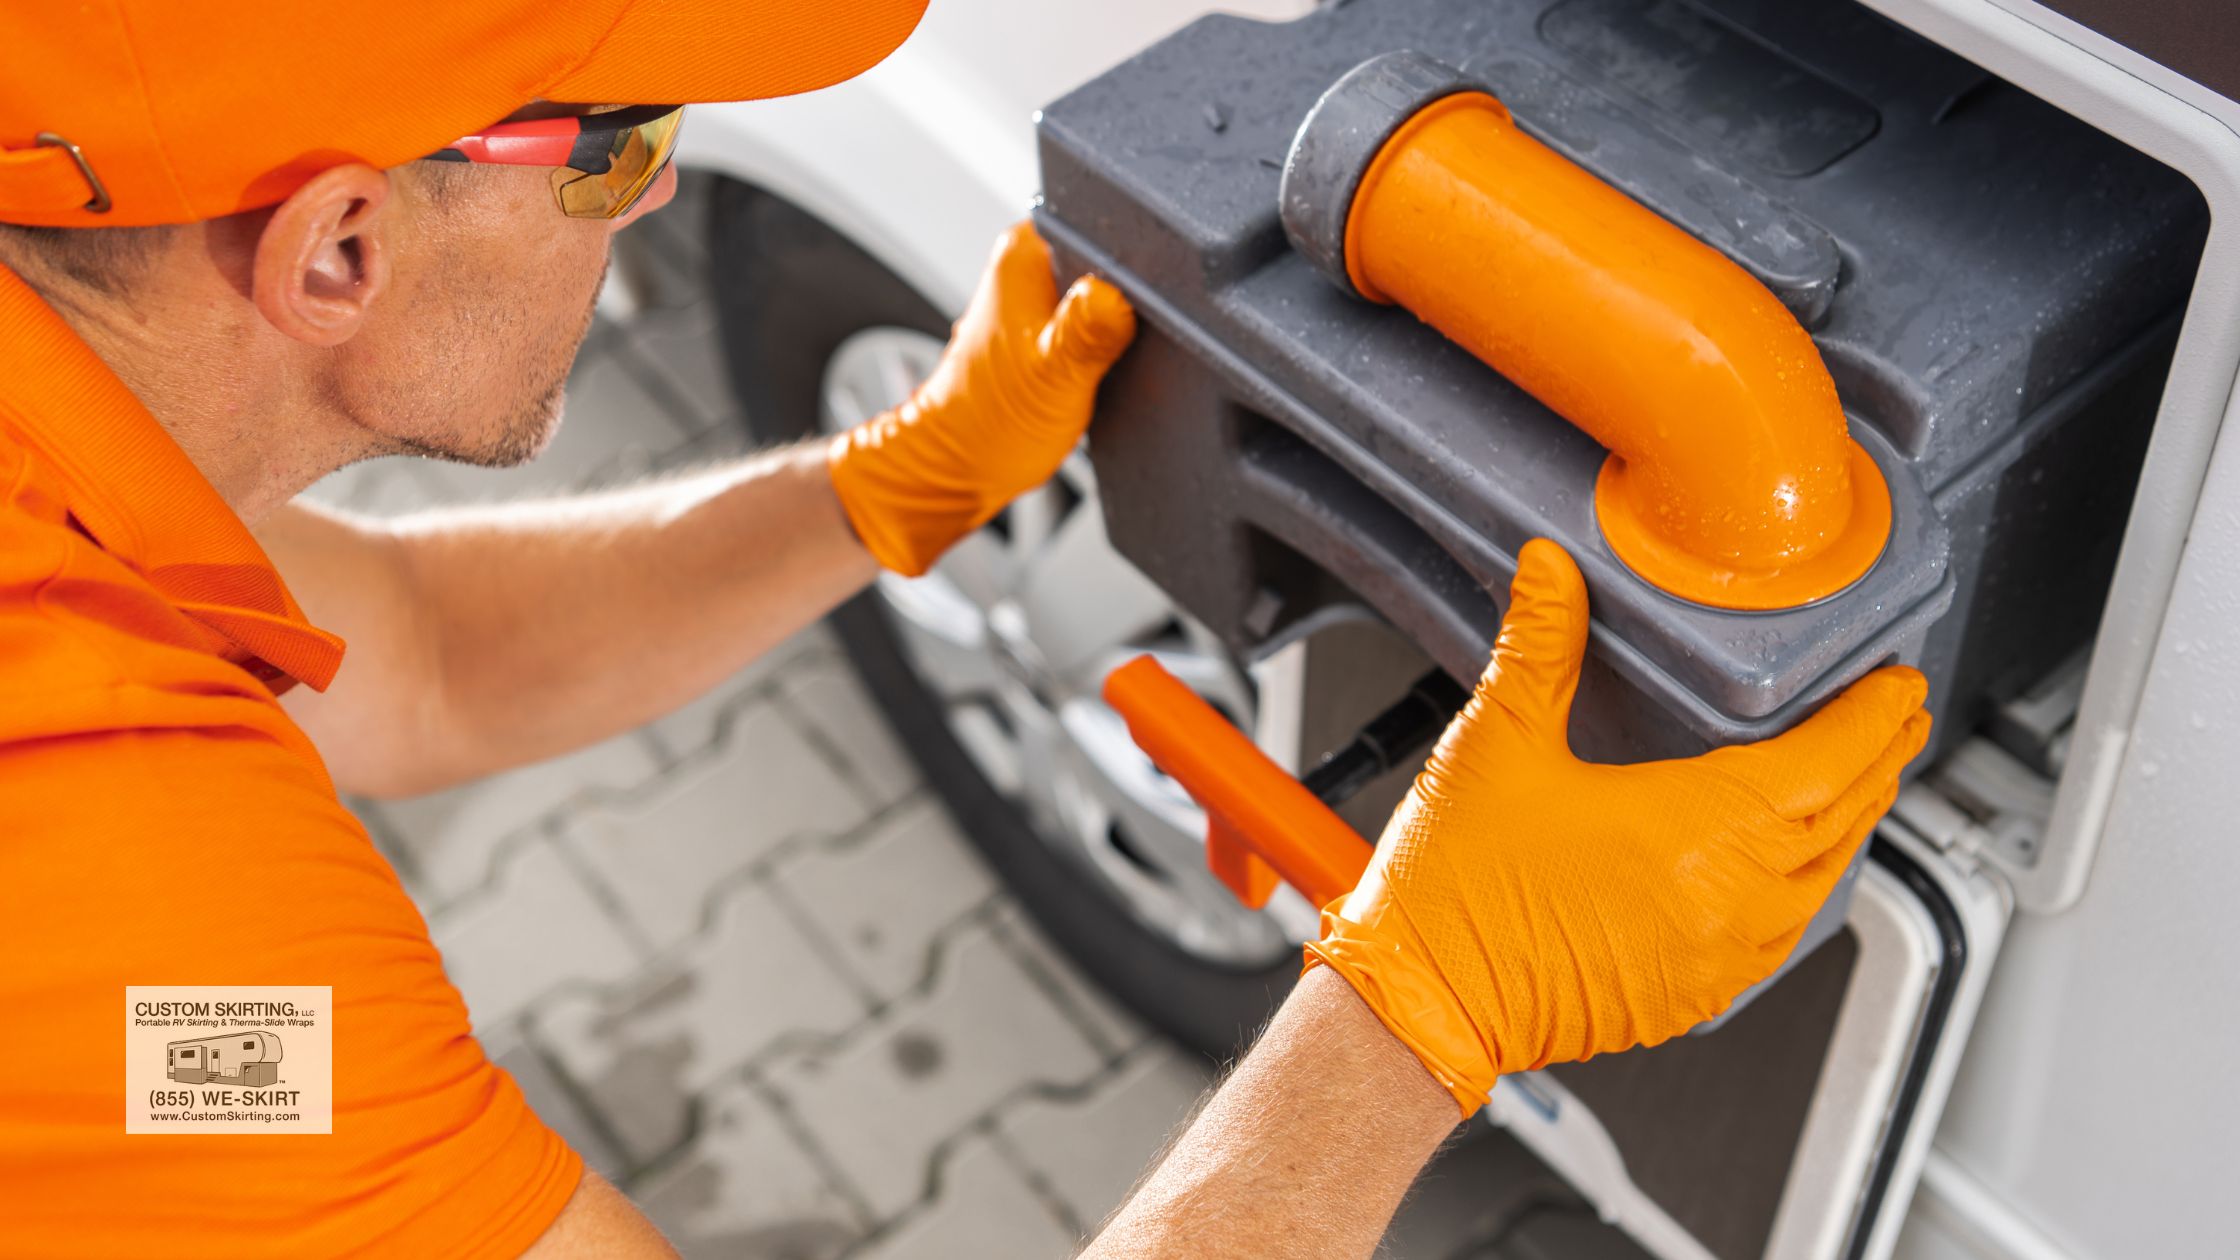
Dumping Equipment and Supplies
Proper waste tank dumping requires specific equipment:
- Sewer hose: Heavy-duty, crush-resistant hose (like RhinoFLEX) with secure fittings
- Hose supports: Create proper slope for complete drainage
- Gloves: Disposable nitrile gloves for sanitation
- Clear elbow adapter: Allows you to see when tanks are completely empty
- Tank rinser: Helps clean the inside of tanks during dumping
Quality matters when selecting dumping equipment. A good sewer hose should last 2-3 camping seasons with proper care. Store dumping equipment separately from other camping supplies to prevent cross-contamination.
Many experienced RVers keep a dedicated “sewer bay” compartment with all dumping supplies organized and readily accessible. This prevents the need to handle clean equipment with contaminated gloves during the dumping process.
The Dumping Process Step-by-Step
Proper tank dumping follows a specific sequence:
- Put on protective gloves
- Connect sewer hose to RV outlet and dump station inlet
- Set up hose supports for proper drainage
- Open black tank valve first and allow to empty completely
- Close black tank valve
- Open gray tank valve to flush hose with soapy water
- Close gray tank valve
- Rinse black tank using built-in rinser if equipped
- Disconnect and rinse equipment
- Store equipment properly
Always dump black tanks first, followed by gray tanks. This sequence uses the soapy gray water to help clean the hose after the black water passes through. Make sure your RV plumbing fittings are securely connected before starting, and never leave tank valves open when connected to a sewer hookup, as this prevents solid waste from being carried away by liquid.
At dump stations without full hookups, work efficiently but thoroughly. Other RVers may be waiting, but rushing can lead to spills or incomplete emptying.
Finding Dump Stations
Locating dump stations is an essential skill for RV travel. Resources include:
- Campground directories
- Apps like Allstays, RV Dumps, and Campendium
- Websites like Sanidumps.com
- State rest areas and welcome centers
- Some truck stops and RV-friendly businesses
Many dump stations are free, while others charge $5-15 per use. Some require purchase of fuel or other services. When planning longer trips, map potential dump stations along your route, especially if boondocking or staying at campgrounds without full hookups, and make sure you have the right RV plumbing fittings to connect properly.
Always leave dump stations cleaner than you found them as a courtesy to fellow RVers. Rinse the area after use and report any issues to the facility management.
RV Plumbing Maintenance and Troubleshooting
Routine Maintenance Tasks
Regular maintenance keeps your RV plumbing system functioning properly:
Monthly tasks:
- Check all connections for leaks
- Clean faucet aerators and showerheads
- Inspect toilet seals and valves
- Run water through all fixtures to keep P-traps full
Seasonal tasks:
- Sanitize fresh water system
- Deep clean gray and black tanks
- Check water heater anode rod
- Inspect water pump operation
- Clean tank sensors
Annual tasks:
- Replace water filter cartridges
- Check water heater pressure relief valve
- Inspect all hoses for cracks or wear
- Test all tank level monitors
- Check for pipe insulation damage
Keeping a maintenance log helps track when tasks were last performed and when components were replaced. This is especially important for living in an RV during winter when plumbing systems face additional stress.
Winterizing Your RV Plumbing
Protecting your RV plumbing from freezing temperatures is essential to prevent costly damage. There are two primary winterizing methods:
- Antifreeze method:
- Drain all water from tanks and lines
- Bypass the water heater
- Pump non-toxic RV antifreeze through all fixtures
- Pour antifreeze into all drain traps
- Air compressor method:
- Drain all water from tanks and lines
- Connect an air compressor with regulator (30-40 PSI max)
- Blow out each line until no water appears
- Add antifreeze to drain traps only
The antifreeze method provides better protection but requires more antifreeze (2-3 gallons typically). The air method uses less antifreeze but may leave trace water that could freeze.
Many newer RVs have built-in winterizing systems that simplify the process. Regardless of method, proper winterizing is essential for keeping moisture out of your RV during winter and protecting your investment.
Common Plumbing Problems and Solutions
Low water pressure:
- Check for kinked hoses
- Clean or replace clogged filters
- Inspect pressure regulator
- Check pump pressure switch settings
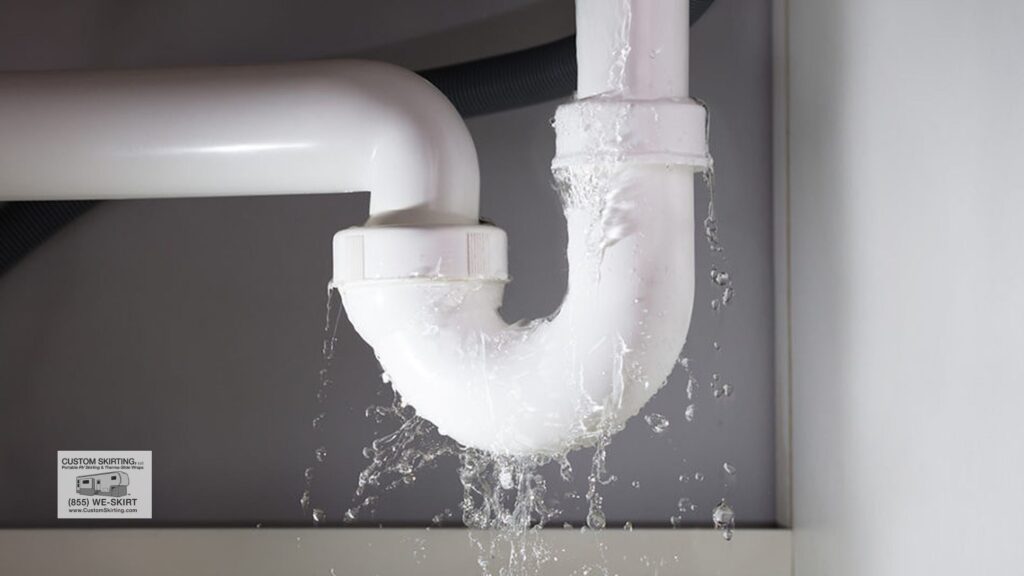
Leaking faucets:
- Replace O-rings or cartridges
- Tighten connections
- Check for freeze damage
Toilet problems:
- Replace worn seals
- Clean valve mechanisms
- Check for proper water level
Tank sensor inaccuracy:
- Deep clean tanks with ice and driving method
- Use sensor cleaning products
- Consider aftermarket sensor systems
Water pump cycling:
- Check for leaks
- Inspect check valve
- Add accumulator tank
- Adjust pressure switch
Odors from drains:
- Ensure P-traps have water
- Clean gray tank
- Use tank treatments
- Check vent pipes for blockages
Most RV plumbing repairs are within the capabilities of a moderately handy RV owner. However, complex issues involving water heaters, major leaks, or structural damage may require professional service.
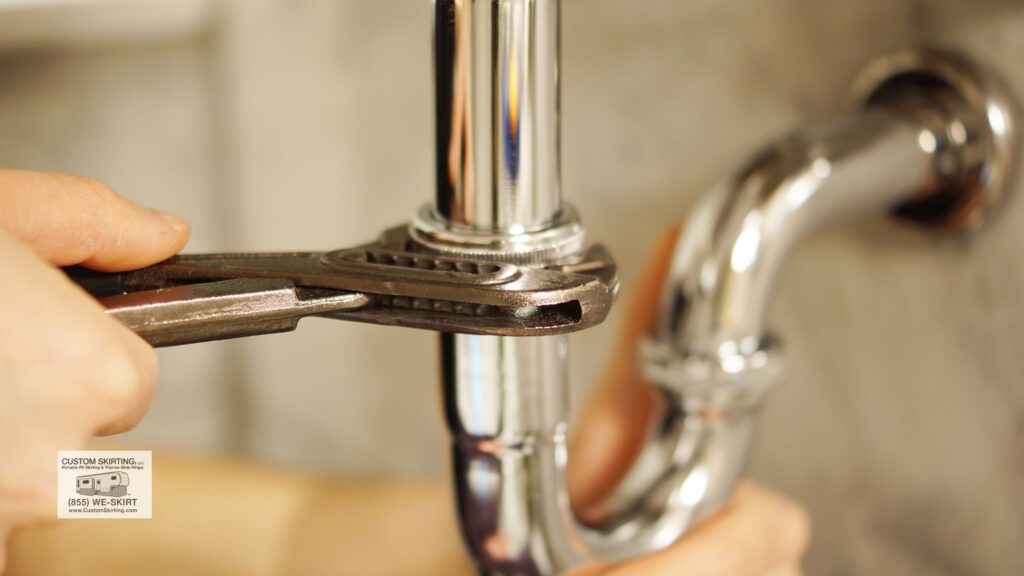
Essential Tools for RV Plumbing Repairs
A well-equipped RV plumbing toolkit should include:
- Adjustable wrenches (various sizes)
- PEX crimping tool and rings
- Pipe cutter for PEX tubing
- Teflon tape and thread sealant
- Silicone sealant
- Rubber washers and O-rings assortment
- Water pressure gauge
- Toilet seal replacement kit
- Tank cleaning wand
- Leak detection solution
Specialized RV plumbing parts can be found at RV supply stores, camping retailers, and online sources. Carrying basic repair supplies allows you to handle emergencies on the road without seeking immediate professional help.
Conclusion
Understanding your RV plumbing system basics is fundamental to enjoying trouble-free camping adventures. From managing fresh water resources to properly handling waste, these systems require regular attention, maintenance, and the right RV plumbing fittings to function properly.
By familiarizing yourself with your specific RV’s plumbing configuration, performing routine maintenance, and knowing how to troubleshoot common issues, you’ll gain confidence and independence on the road. Keep a log of maintenance activities, stock essential repair supplies like spare RV plumbing fittings, and consider upgrades that match your camping style.
Remember that preventive maintenance is always easier and less expensive than emergency repairs. Taking care of your RV plumbing system ensures it will take care of you, providing all the comforts of home wherever your travels lead.
Protect Your RV Plumbing System Year-Round
Don’t let freezing temperatures damage your RV plumbing! Custom Skirting offers the nation’s #1 RV skirting solution, custom-tailored on-site for a perfect fit. Our exclusive “No-Snap, No-Gap” channel system provides superior protection against freezing temperatures, effectively sealing out water, snow, and wind. With over a decade of testing in the harshest northern winters, our skirting has proven itself as the top choice for RV enthusiasts who want to protect their investment. The user-friendly design allows for quick setup and easy storage when you’re ready to hit the road again. Experience the Custom Skirting difference and keep your RV plumbing system safe all winter long!